
One of the biggest challenges a photographer faces is the task of explaining to someone how exactly ISO, aperture, and shutter speed relate to one another. If it were an easy explanation it would take a brief moment and then everyone would be an expert at achieving perfect exposure in any situation. If I could mind meld with you like Spock from Star Trek, I wouldn’t… it’s too dangerous… I’d probably just refer you to this article instead.
First, a quick definition of what ISO, aperture, and shutter speed are:
The numerical exposure index of a photographic film under the system adopted by the International Standardization Organization, used to indicate the light sensitivity of the film’s emulsion. Increasing your ISO on digital cameras increases the sensitivity of your cameras sensor (and may add digital noise).
A space through which light passes in an optical or photographic instrument, especially the variable opening by which light enters a camera. Decreasing your aperture lets more light in while increasing your aperture actually reduces the amount of light that enters the camera. Lower aperture number means wider opening, more light, and reduced depth of field. A higher aperture number means narrower opening, less light, and larger depth of field
The time for which a shutter is open at a given setting. A slower shutter speed shows more motion in the form of blur while a faster shutter speed can freeze motion.
*Click on ISO, Aperture, or Shutter Speed for their definitions
Phew, now that that’s out-of-the-way let’s look at kitten pictures on the web… I’m kidding, little Mittsy can just wait a dang minute. Now it’s time to learn how each of these manual settings correlate with one another. Always remember, adjusting one of these settings will have a direct impact on the exposure and can be offset by adjusting one of the other exposure settings… That’s correlation.
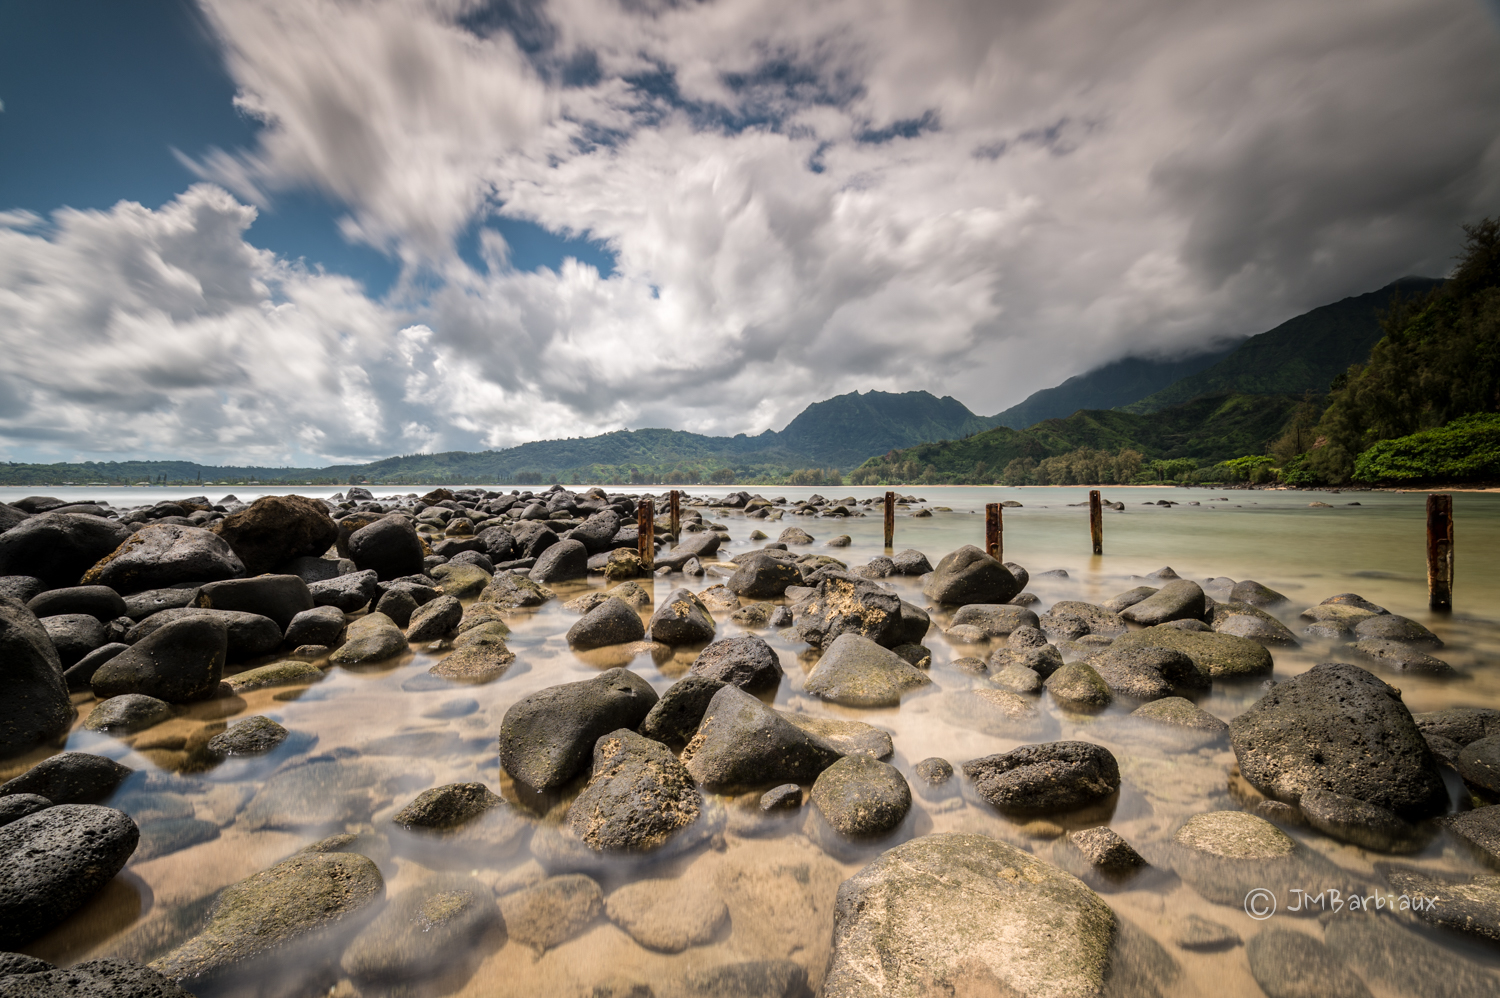
 The ISO was my first adjustment of the evening when I took this shot, the light was low and I had no tripod. In order to keep my shutter speed fast enough to avoid blurry images from camera shake I had to boost ISO to 3200 for a shutter speed of 1/80 sec..
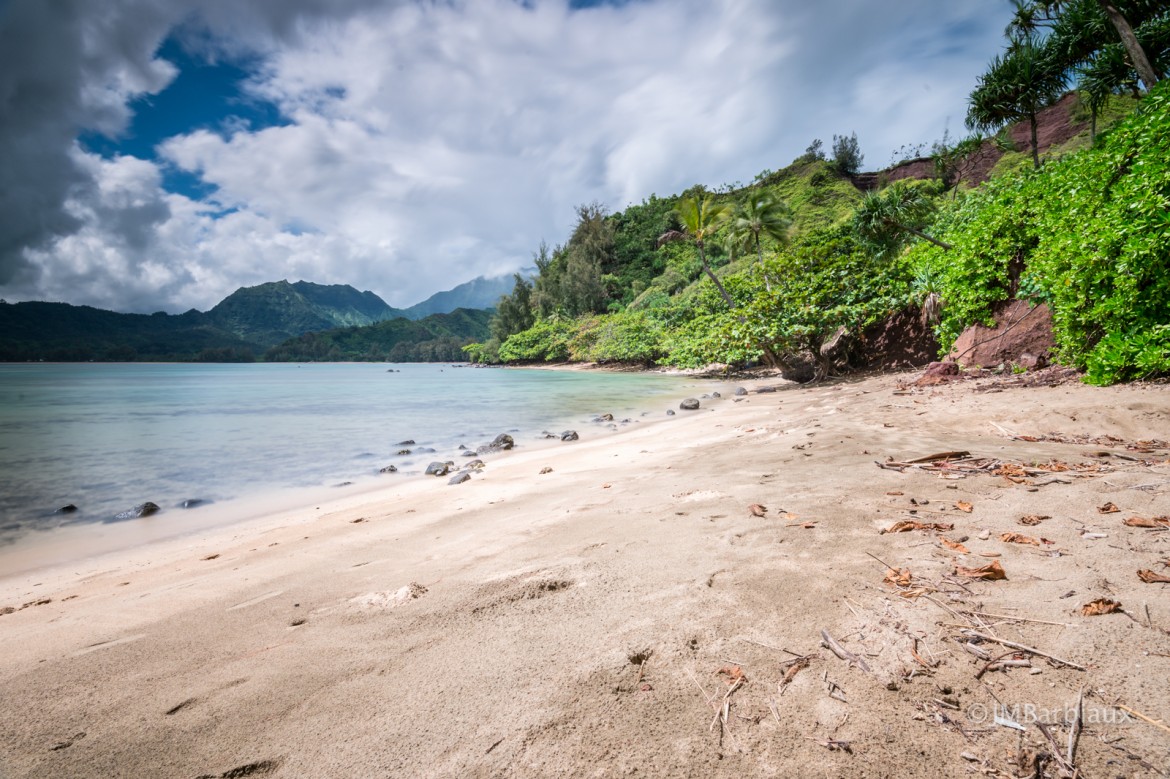
The subject I’m photographing and the effect I want to capture determine which direction I move either my shutter speed or aperture. If I want to capture motion by blurring my subject or the water (like in the image at the top of this article) then I’ll make sure I have a slower shutter speed. When I reduce my shutter speed I’m leaving the sensor exposed to more light that could over-expose the image unless I compensate somehow.
Think of your shutter speed and aperture as two small dams and the light as the water, if your goal were to keep the water (light) coming through the channel (your lens) at the same speed you’d need to counter whatever change you make with one dam by adjusting the other dam. If you lower the first dam by a foot you’d need to raise the second dam by a foot to compensate for the increased water flow. This adjustment would keep the water flowing at the same speed and prevent the flooding of some unsuspecting village of innocent children (your cameras sensor).
Learn by doing, that is my motto (that I stole from the millions of other people who also use that as a motto). Let’s discuss various situations you may find yourself in and how to master your manual settings to capture them.
1.) Photographing a small child in low light (think inside or outside as the sun sets or rises).
Small children are a handful, they move around like crack addicts and sometimes like to do the opposite of what you say. Photographing small children is for those of you with the gift of patience. The first challenge you’ll face is obtaining an adequate exposure without lowering your shutter speed. You’ll want at least 1/100 to photograph those rug-rats, otherwise you’ll end up with blurry images every time they turn their head or move a hand.
In order to increase your shutter speed you’ll want to open your aperture (lower f/number). The wider you open your aperture the narrower your depth of field gets (the area that is in focus vs. the area that gets blurred out of focus). I mention this because if you have ever photographed more than one person at a time with a narrow depth of field (wide aperture) you may have noticed that unless they are both standing right next to each other, on the same focal plane, one may be a little out of focus if he or she is standing slightly behind or in front of the other. There is not magic bullet for this, stand/sit them next to each other or use a narrower aperture.
If you would like to use a narrower aperture for a larger group of children then you can compensate by increasing your ISO. Be aware that depending on your camera this may create digital noise that can degrade the quality of your image. The best advice I can give you is adjust your settings and try a few different methods so you won’t be disappointed in post processing.
2.) Photographing moving water.
One of the best ways I know how to show someone the effects of the different exposure adjustments on their camera is by having them photograph moving water. We have all seen photograph of water where it looks surreal and wondered how to recreate that shot at one time or another. By slowing your shutter speed down you can create water that looks as if it’s iced over, you can make choppy water look calm.
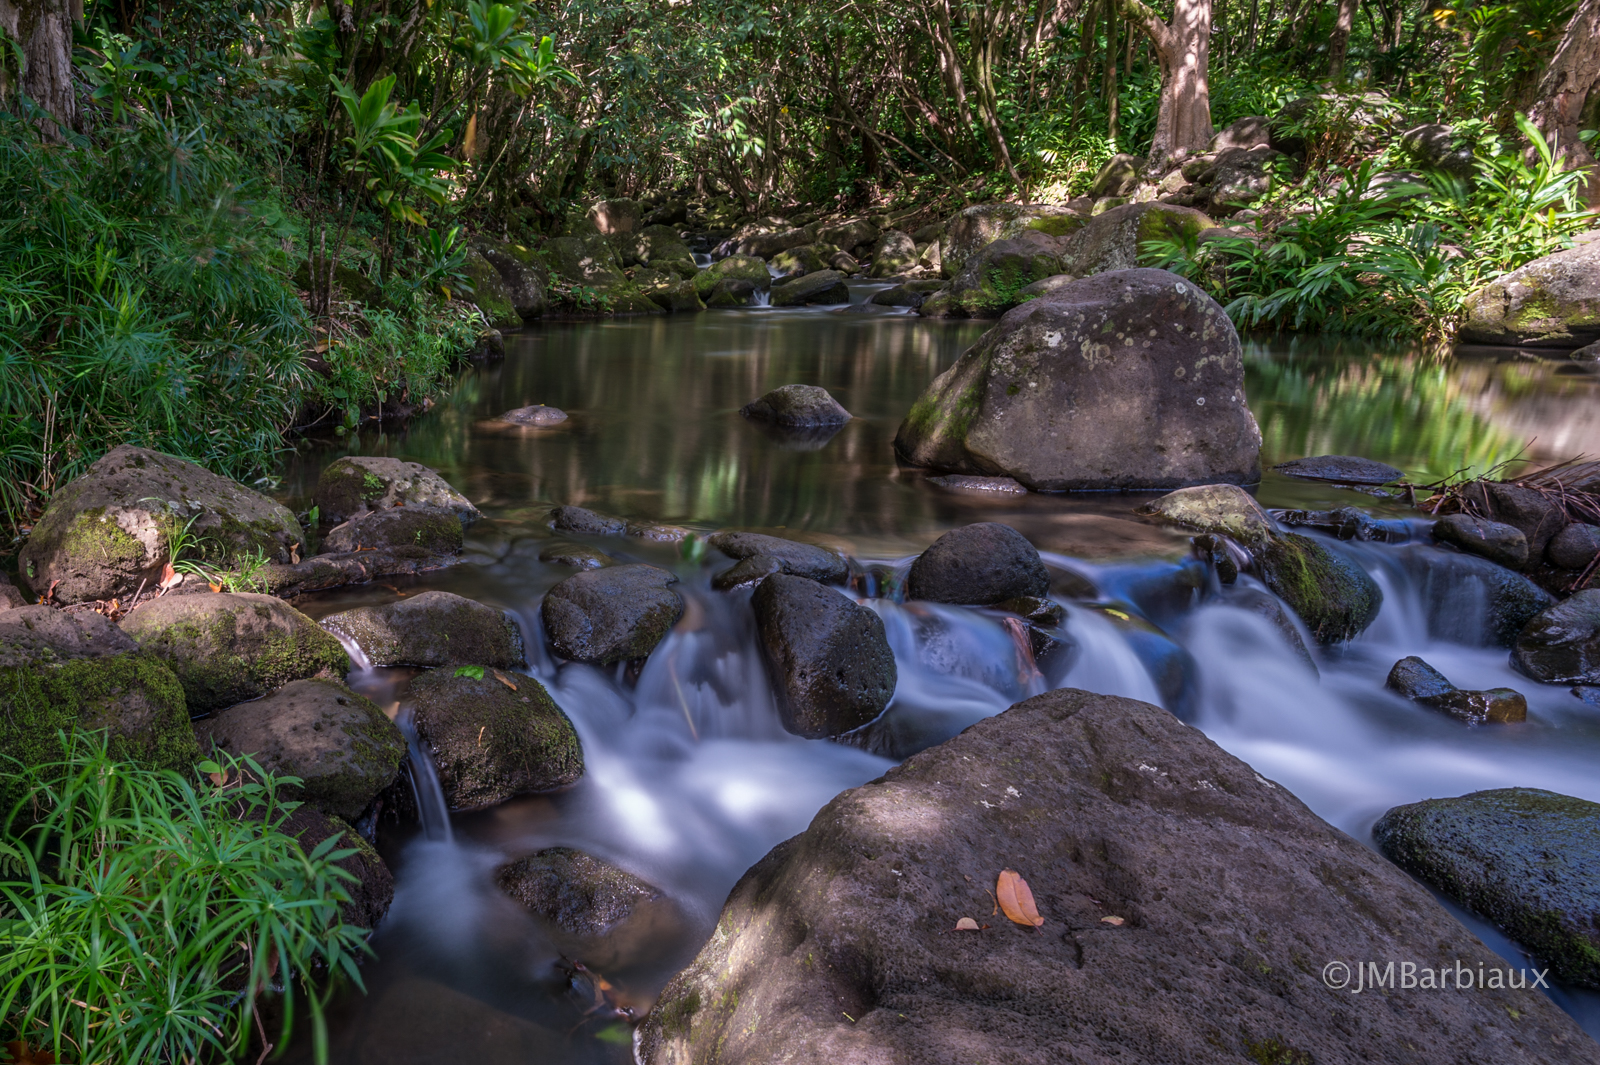
 A shutter speed of 125 seconds (2 minutes and five seconds) made this choppy water look like glass.
So how do we slow the shutter speed down? There are a couple of different ways. Remember, as you slow the shutter speed you’re increasing the amount of light that will hit your sensor (you’re leaving the dam down longer). In order to compensate for the increase of light that will enter your camera you’ll need to narrow the aperture (reduce the amount of light that can enter your camera). That is assuming you don’t need to compensate for too much light.
*Keep your ISO at its lowest setting if you’re trying to slow your shutter speed down
If you have too much light to adequately slow your shutter speed you can narrow your aperture as narrow as it goes (high f/number). You’ll experience a little diffraction but that’s the trade-off.
Again, you can purchase a neutral density filter that reduces the amount of light able to enter your camera’s lens which will allow you to slow your shutter speed considerably. To read more about neutral density filters check out this article or use the search for “neutral density” in the search bar above this article.
3.) Capturing movement.
There will be times when you want to emphasize movement in your images while keeping things sharp enough that your viewers will recognize what you’re photographing. The image below was taken in NYC and the goal was to portray the speed at which taxis move through the Big Apple while still knowing it was a taxi cab.
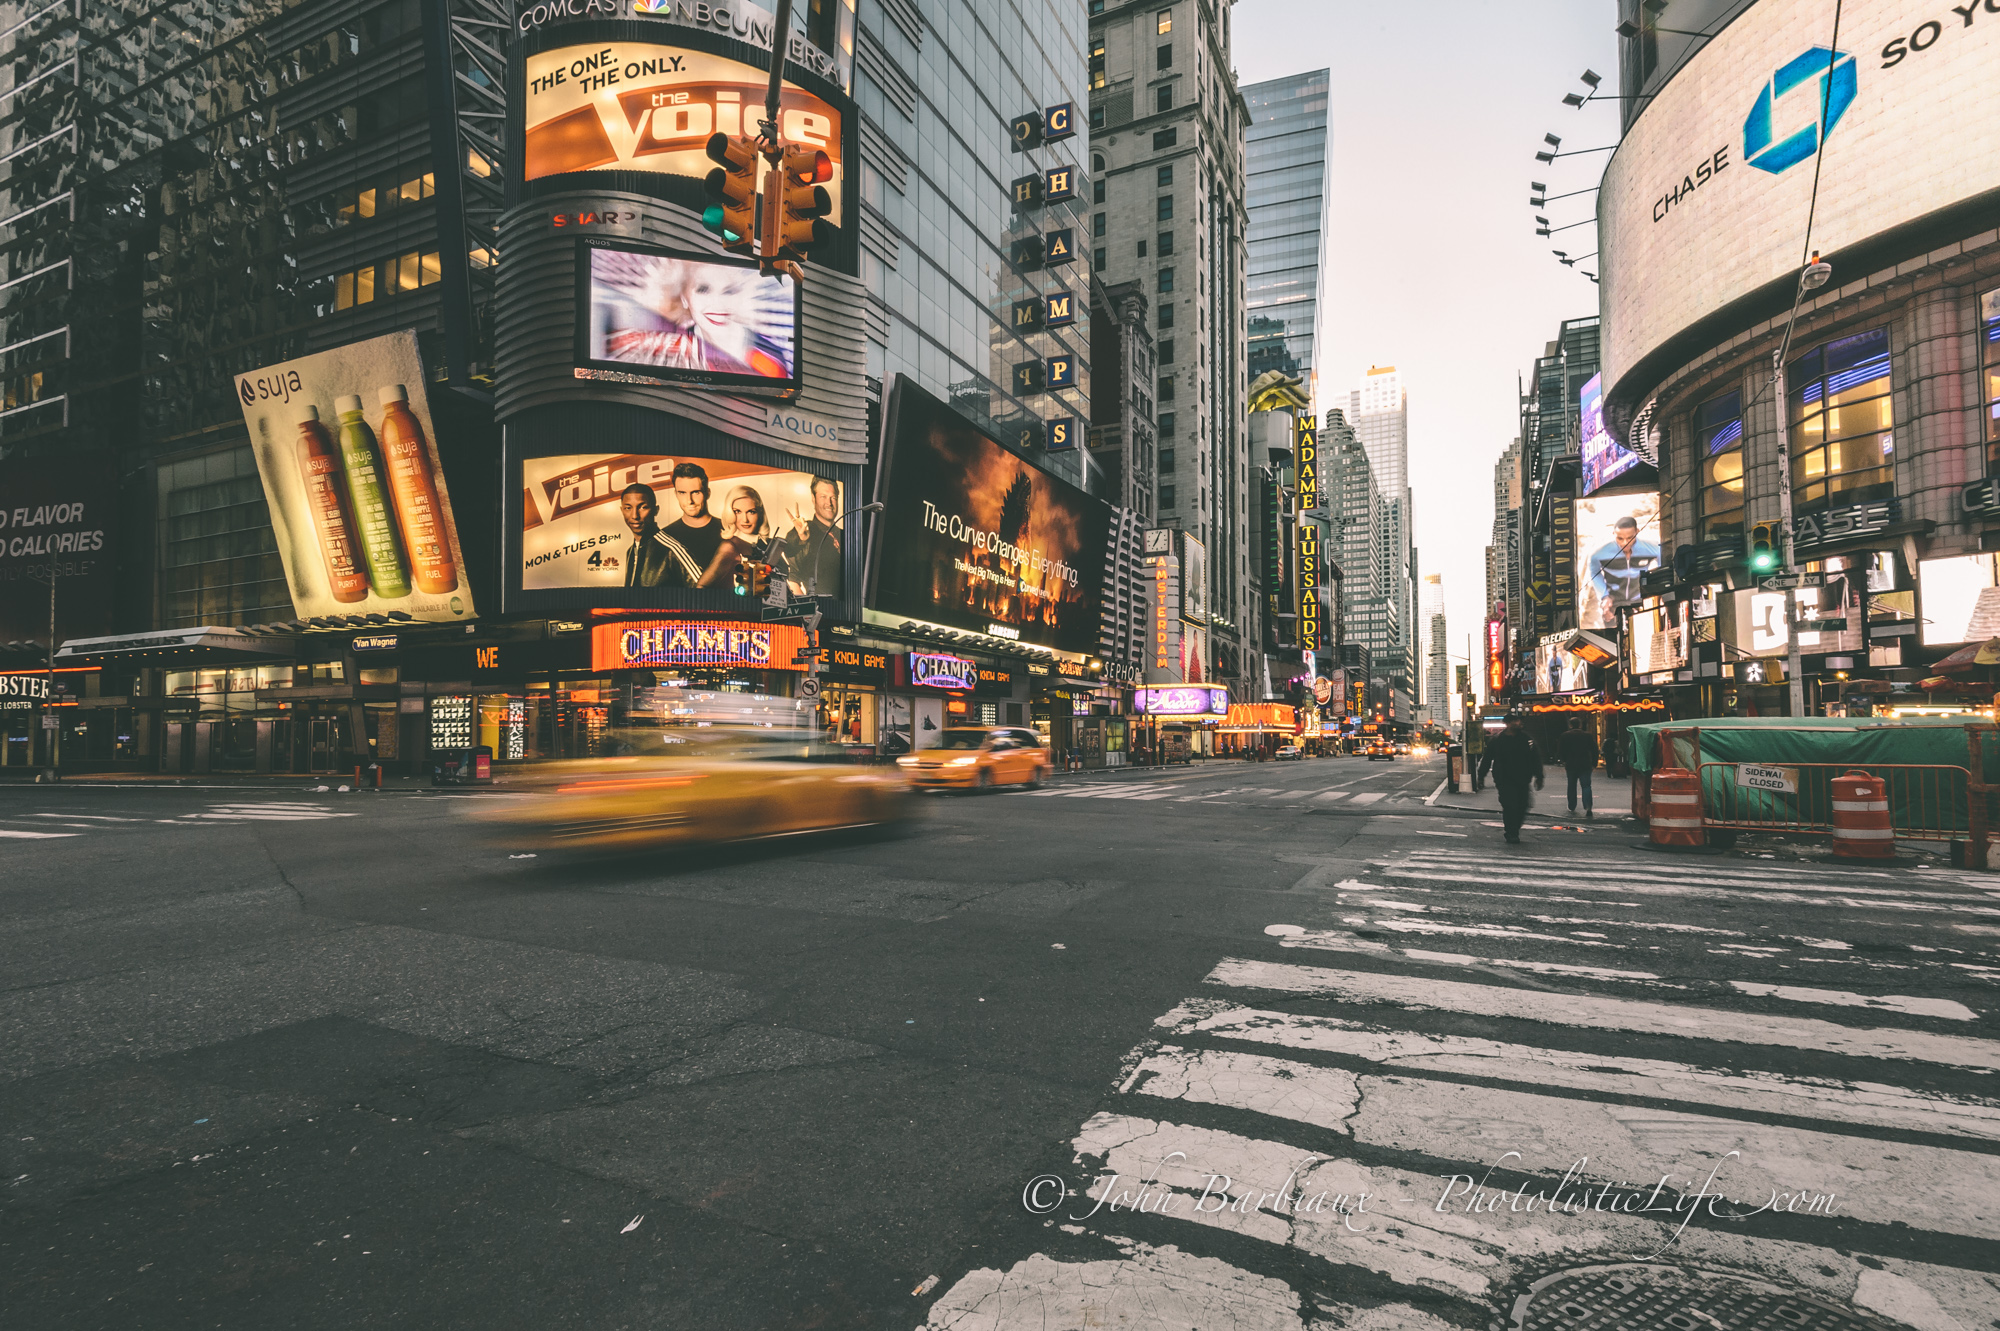 ISO 1600, 16mm, f/20, 1/20 sec.
If you look at the pictures settings above you’ll notice that because I left my ISO at 1600 (typical for street photography) I had to quickly compensate by decreasing my aperture (larger f/number) in order to slow my shutter speed to 1/20. Alternatively, I could/should have moved my ISO to 100 and I would have been able to increased my aperture (smaller f/number) significantly. With shutter speed, aperture, and ISO there is normally more than one way to get to the exposure you’d like by adjusting one, two, or all of the three variables.
The more you experiment with the relationship between ISO, aperture, and shutter speed the faster you’ll master their relationship. When you’re ready to push the limits of what your camera can do check out these articles:
Quick Tip – Motion Blur Without A Filter
3 Ways To Improve Your Light Trails
Photo Challenge – Remove Crowds Without PhotoShop
If you still feel a little hazy on exposure and the relationship between ISO, aperture, and shutter speed be sure to check out this article: Easy Graph To Learn ISO, Aperture, And Shutter Speed.
After reading this you should have a handle on exposure and be able to overcome just about any situation you and your camera may find yourselves in. Be sure to bookmark PhotolisticLife and check back regularly for more photography tips and tricks. You can join our Flickr page by visiting this link. Feel free to leave your thoughts in the comments below.

Thank you for the article. I have doing iPhone photography and just moved up to the entry level Nikon D3100 so there’s certainly been a learning curve with getting around exposure using ISO, AF and shutter speed.
You’re welcome! Thank you for the feedback. So glad you’re progressing and evolving, I’m sure you’ll love the D3100.