Neutral density filters are an essential part of any photographers, worth their weight in sepia colored stone, camera bag. Neutral density filters (or ND filters) give you a way to create unique photographs without the use of fancy finger work in post processing.
There are a lot of great article about ND filters out there, many of them with great advice on how and when to use them. This article is going to focus on one of the primary reasons I incorporate the ND filter into my normal workflow, reducing distracting elements. The easiest way to demonstrate this is by using rushing water as an example.
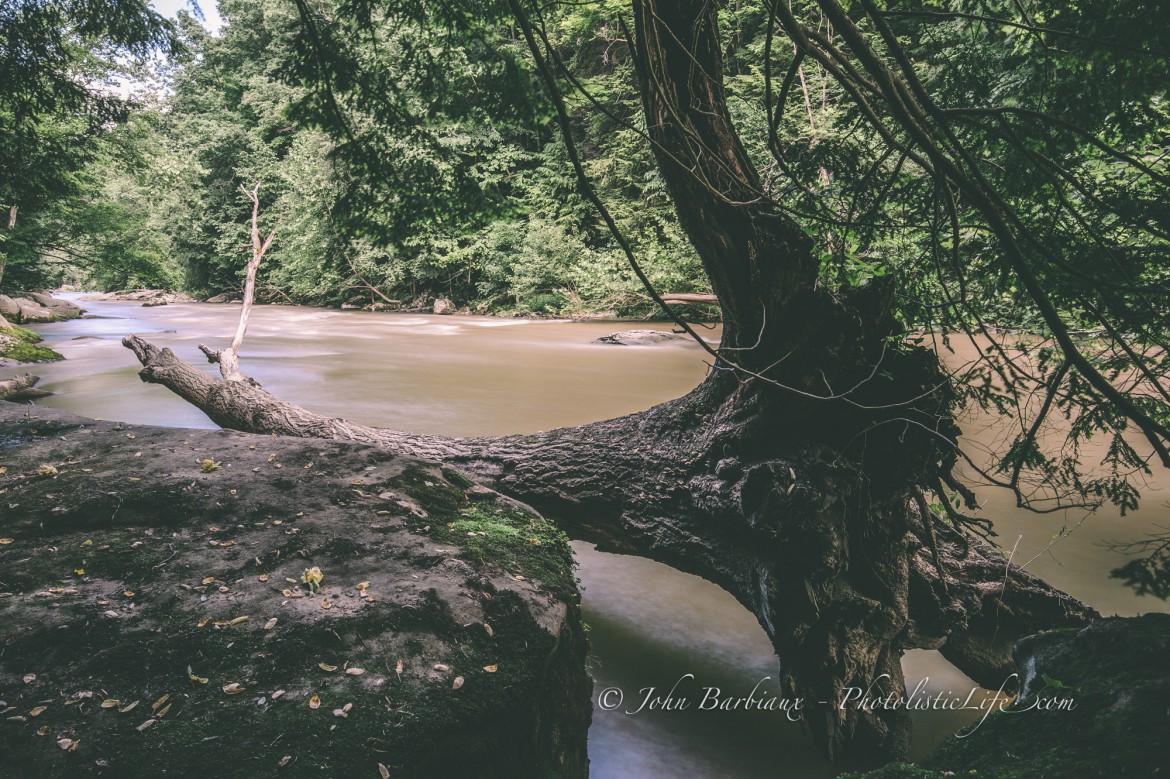
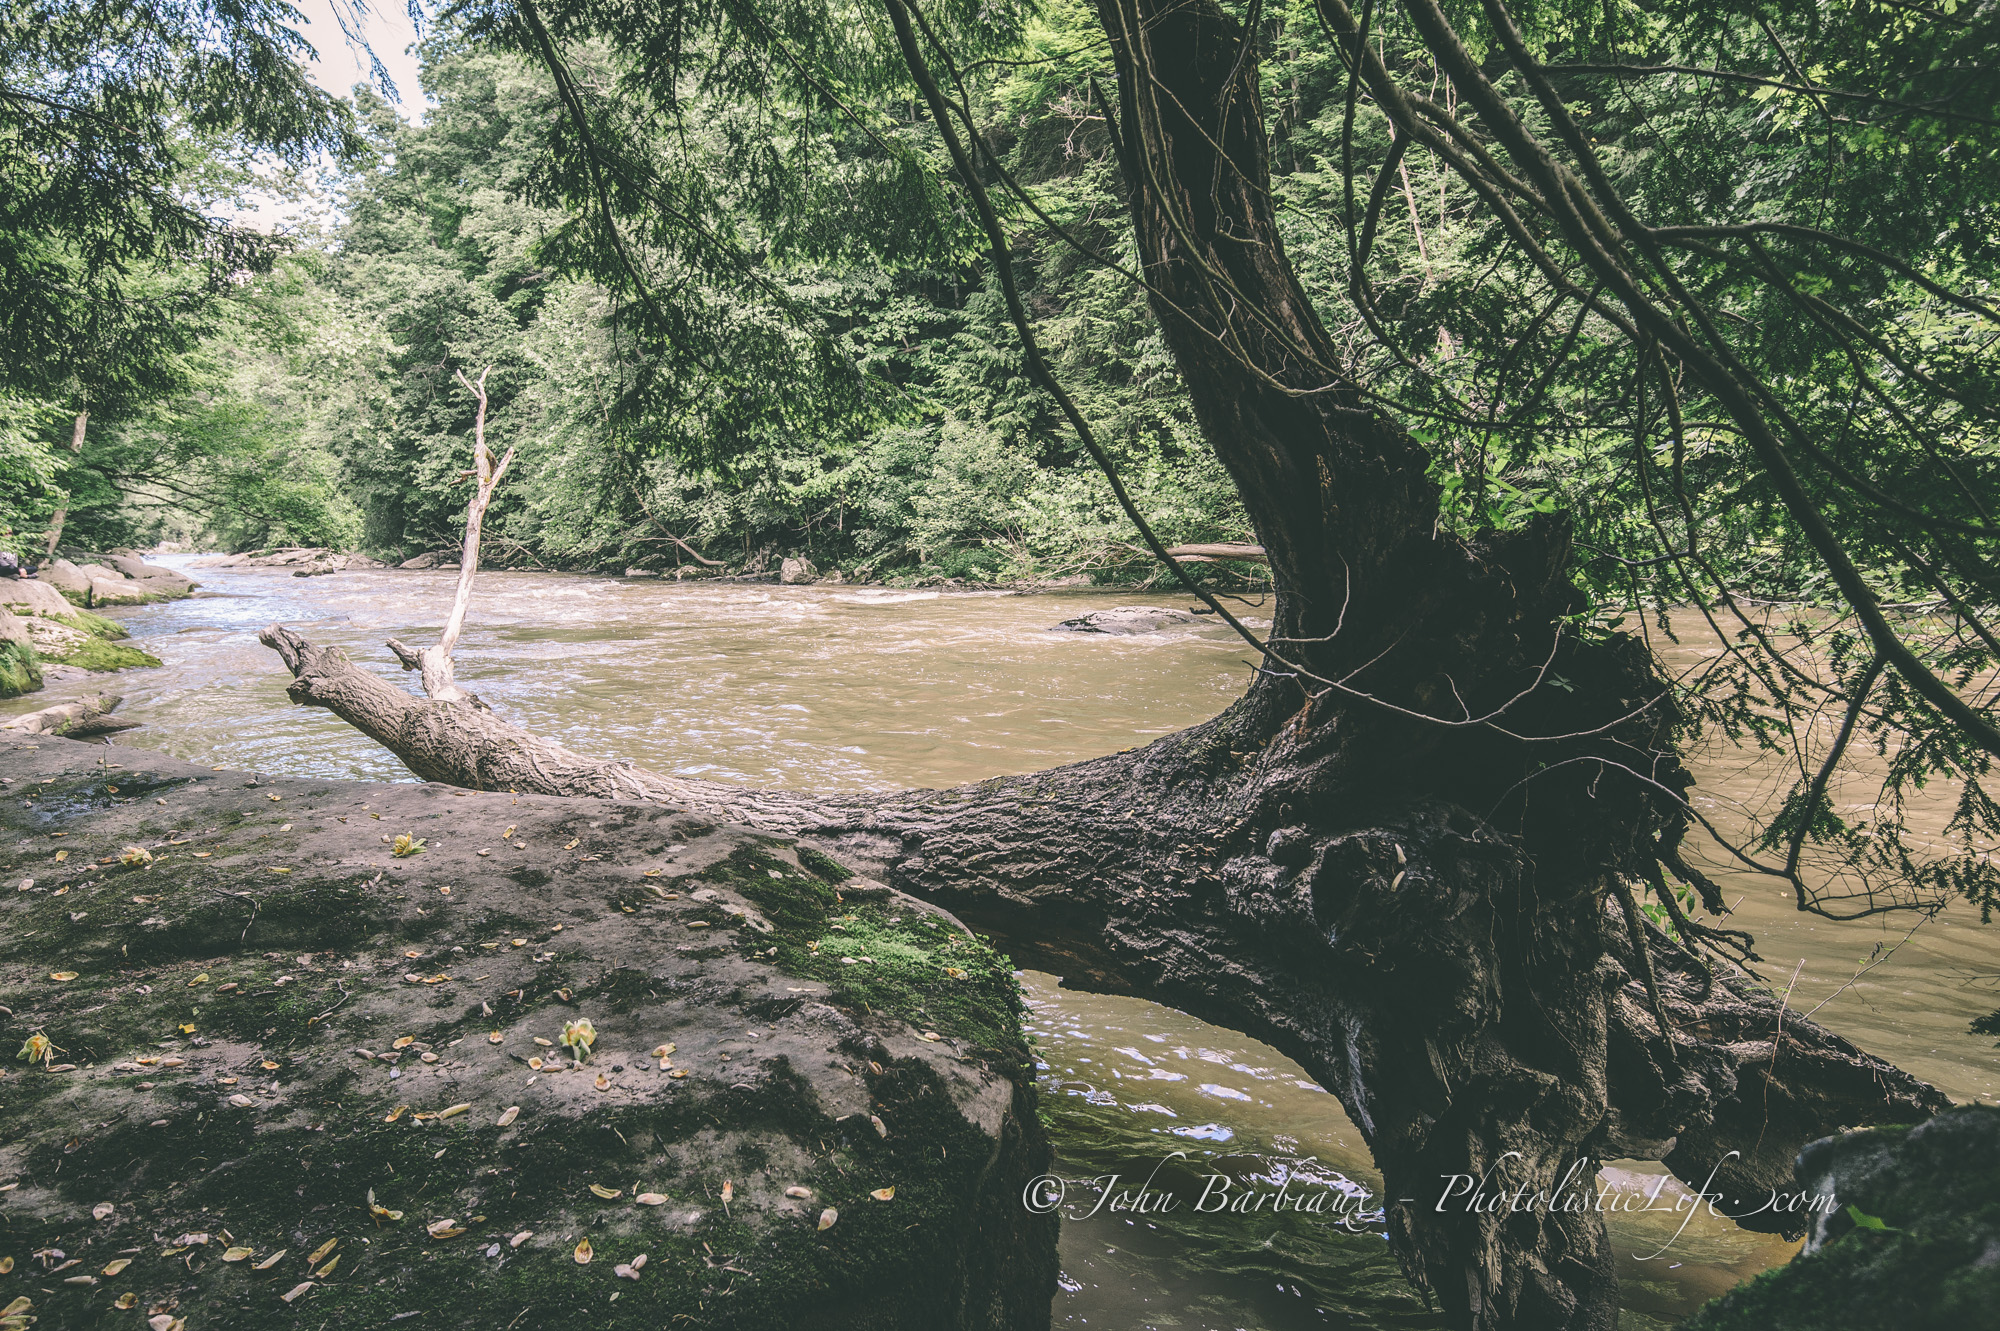 Photo taken without ND filter
When you see the photograph above you’ll notice that, visually, it’s a pretty busy photograph. The ripples in the water blend with the lines in the bark on the downed tree. What attracted me to this scene was the large roots attached to the down tree and the texture throughout. Unfortunately, the texture of the tree does not stand out against the ripples of the rushing water.
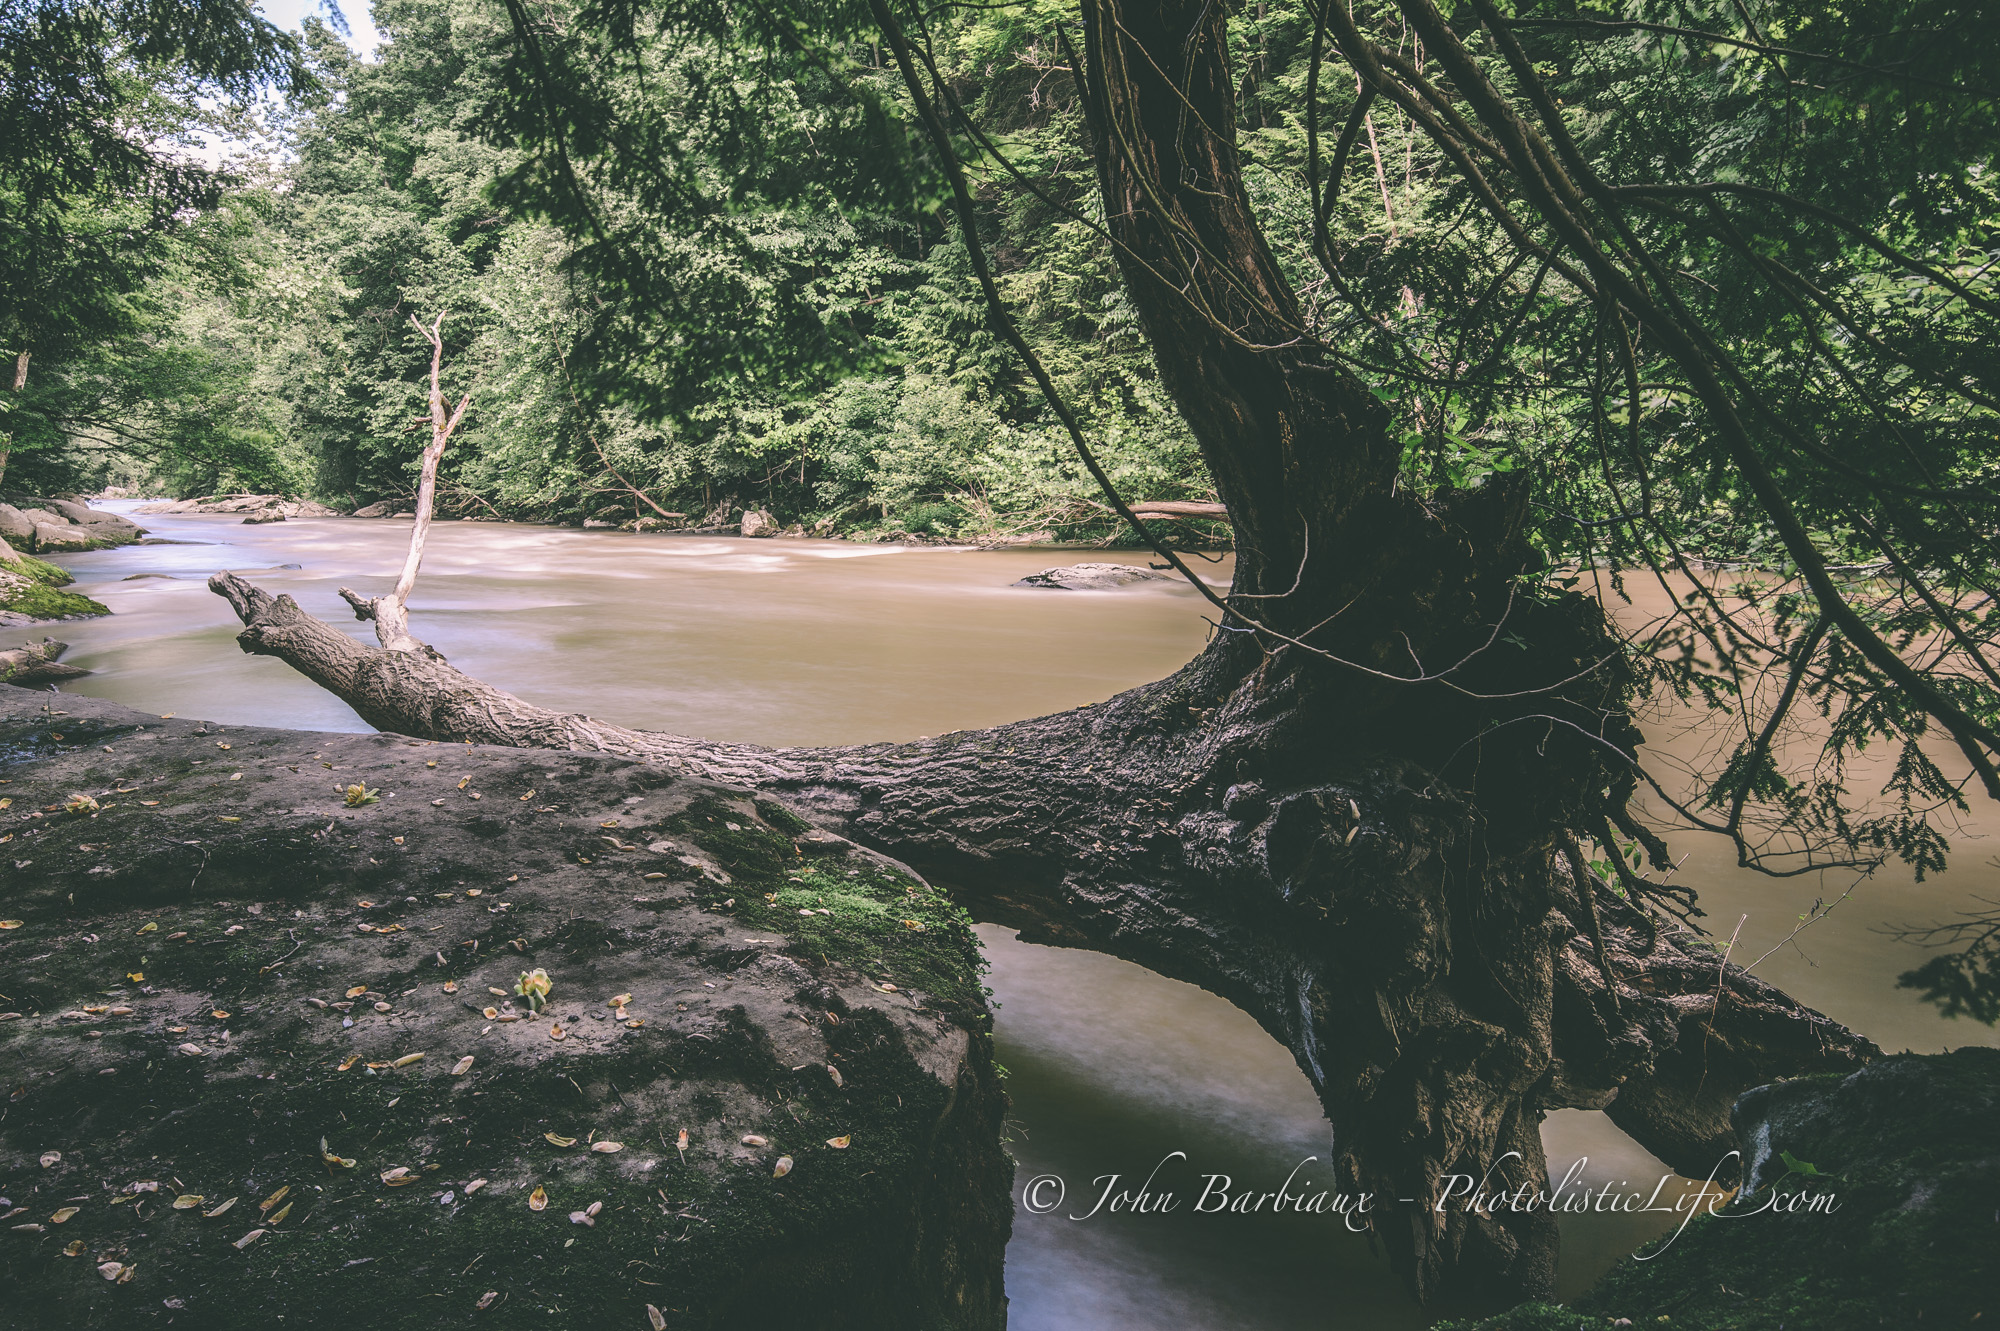 Photograph taken with a six stop ND filter
A neutral density filter can be used to slow your shutter speed enough to make the water look as smooth as glass, letting the tree and it’s roots stand out against the water. The photograph above isn’t a stellar photograph but it does emphasize the subtle improvement a neutral density filter can have on an image.
If you plan on using neutral density filters I highly recommend B+W filters. Cheap ND filters can leave a color hue on your images as well as compromise the image quality by using cheap plastic as opposed to glass. Here are a few essential tips if you’re new to ND filters:
- Cover your viewfinder otherwise light will leak in and cause discoloration on your images.
- Compose and auto-focus your camera before affixing the ND filter to your camera, once the camera is focused you can switch to manual focus so it does not hunt for focus when you press the shutter button. Once the filter is affixed to the lens you may not be able to see through the viewfinder to compose the image and your camera may not be able to achieve focus using auto focus.
- Turn off vibration reduction on your lens (this should be done when you’re using a tripod with or without filters).
- When buying a new filter buy the filter that fits the largest lens you have and then purchase step up rings for your other lenses (they run about $5 or $6 on Amazon) so you can use one sized filter on all the different sized lenses you own.