Vacation time is ramping up around the world, folks are dusting off their camera and bringing their photography skills out of hibernation. So what will be different this year? Will you snap the same wide-angle, all-encompassing shots you took last year? Or are you ready to take your vacation photography to the next level? Let’s assume you want to increase the quality of your photography and leave the tourist shooting to, well, the tourists. Here are some tips to improve your shots with little to know cost.
Perspective
Perspective is everything, your composition skills could be spot on but if you’re only shooting from eye height, standing up, your photographs will come out looking sub-par. Get low, get high, shoot sideways and underneath things, be creative. When you stare out at a beautiful landscape ask yourself what it is that draws you to it. Is it the color, the contrast, the lines, or a particular subject? Once you’ve isolated the point of interest, try to capture that in your frame without encompassing everything. Use leading lines or some sort of frame to emphasize what it is that you saw that made it a photo worth taking.
For example, try to compose photographs that tell a story without showing the entire scene. Almost like reading the front cover of a book at the book store, they always have the most interesting points of the book on the cover to entice you to buy/read the book. You want to try to do the same thing with your photograph.
Filters
There is no easier way to capture a photograph that sticks out from the herd than by using a lens filter. I’m not talking about Instagram filters or cheap camera phone filters that make your photographs look like crap. I’m talking about high quality filters that go on the end of your camera lens. If you’re not familiar with all your filter options and what they do read my Camera Lens Filter Guide here.
There are three filters you should never leave home without, the polarizing filter, the neutral density filter, and the graduated neutral density filter. Yes, I did not mention the UV filter… UV filters were created to protect analog cameras from the damaging UV rays messing up your film. Camera’s these days are not as sensitive (if at all) to UV rays and I’d argue the filter actually does more harm than good. Remember, any glass you put in front of your lens will degrade your image slightly (or a lot if it’s a cheap filter).
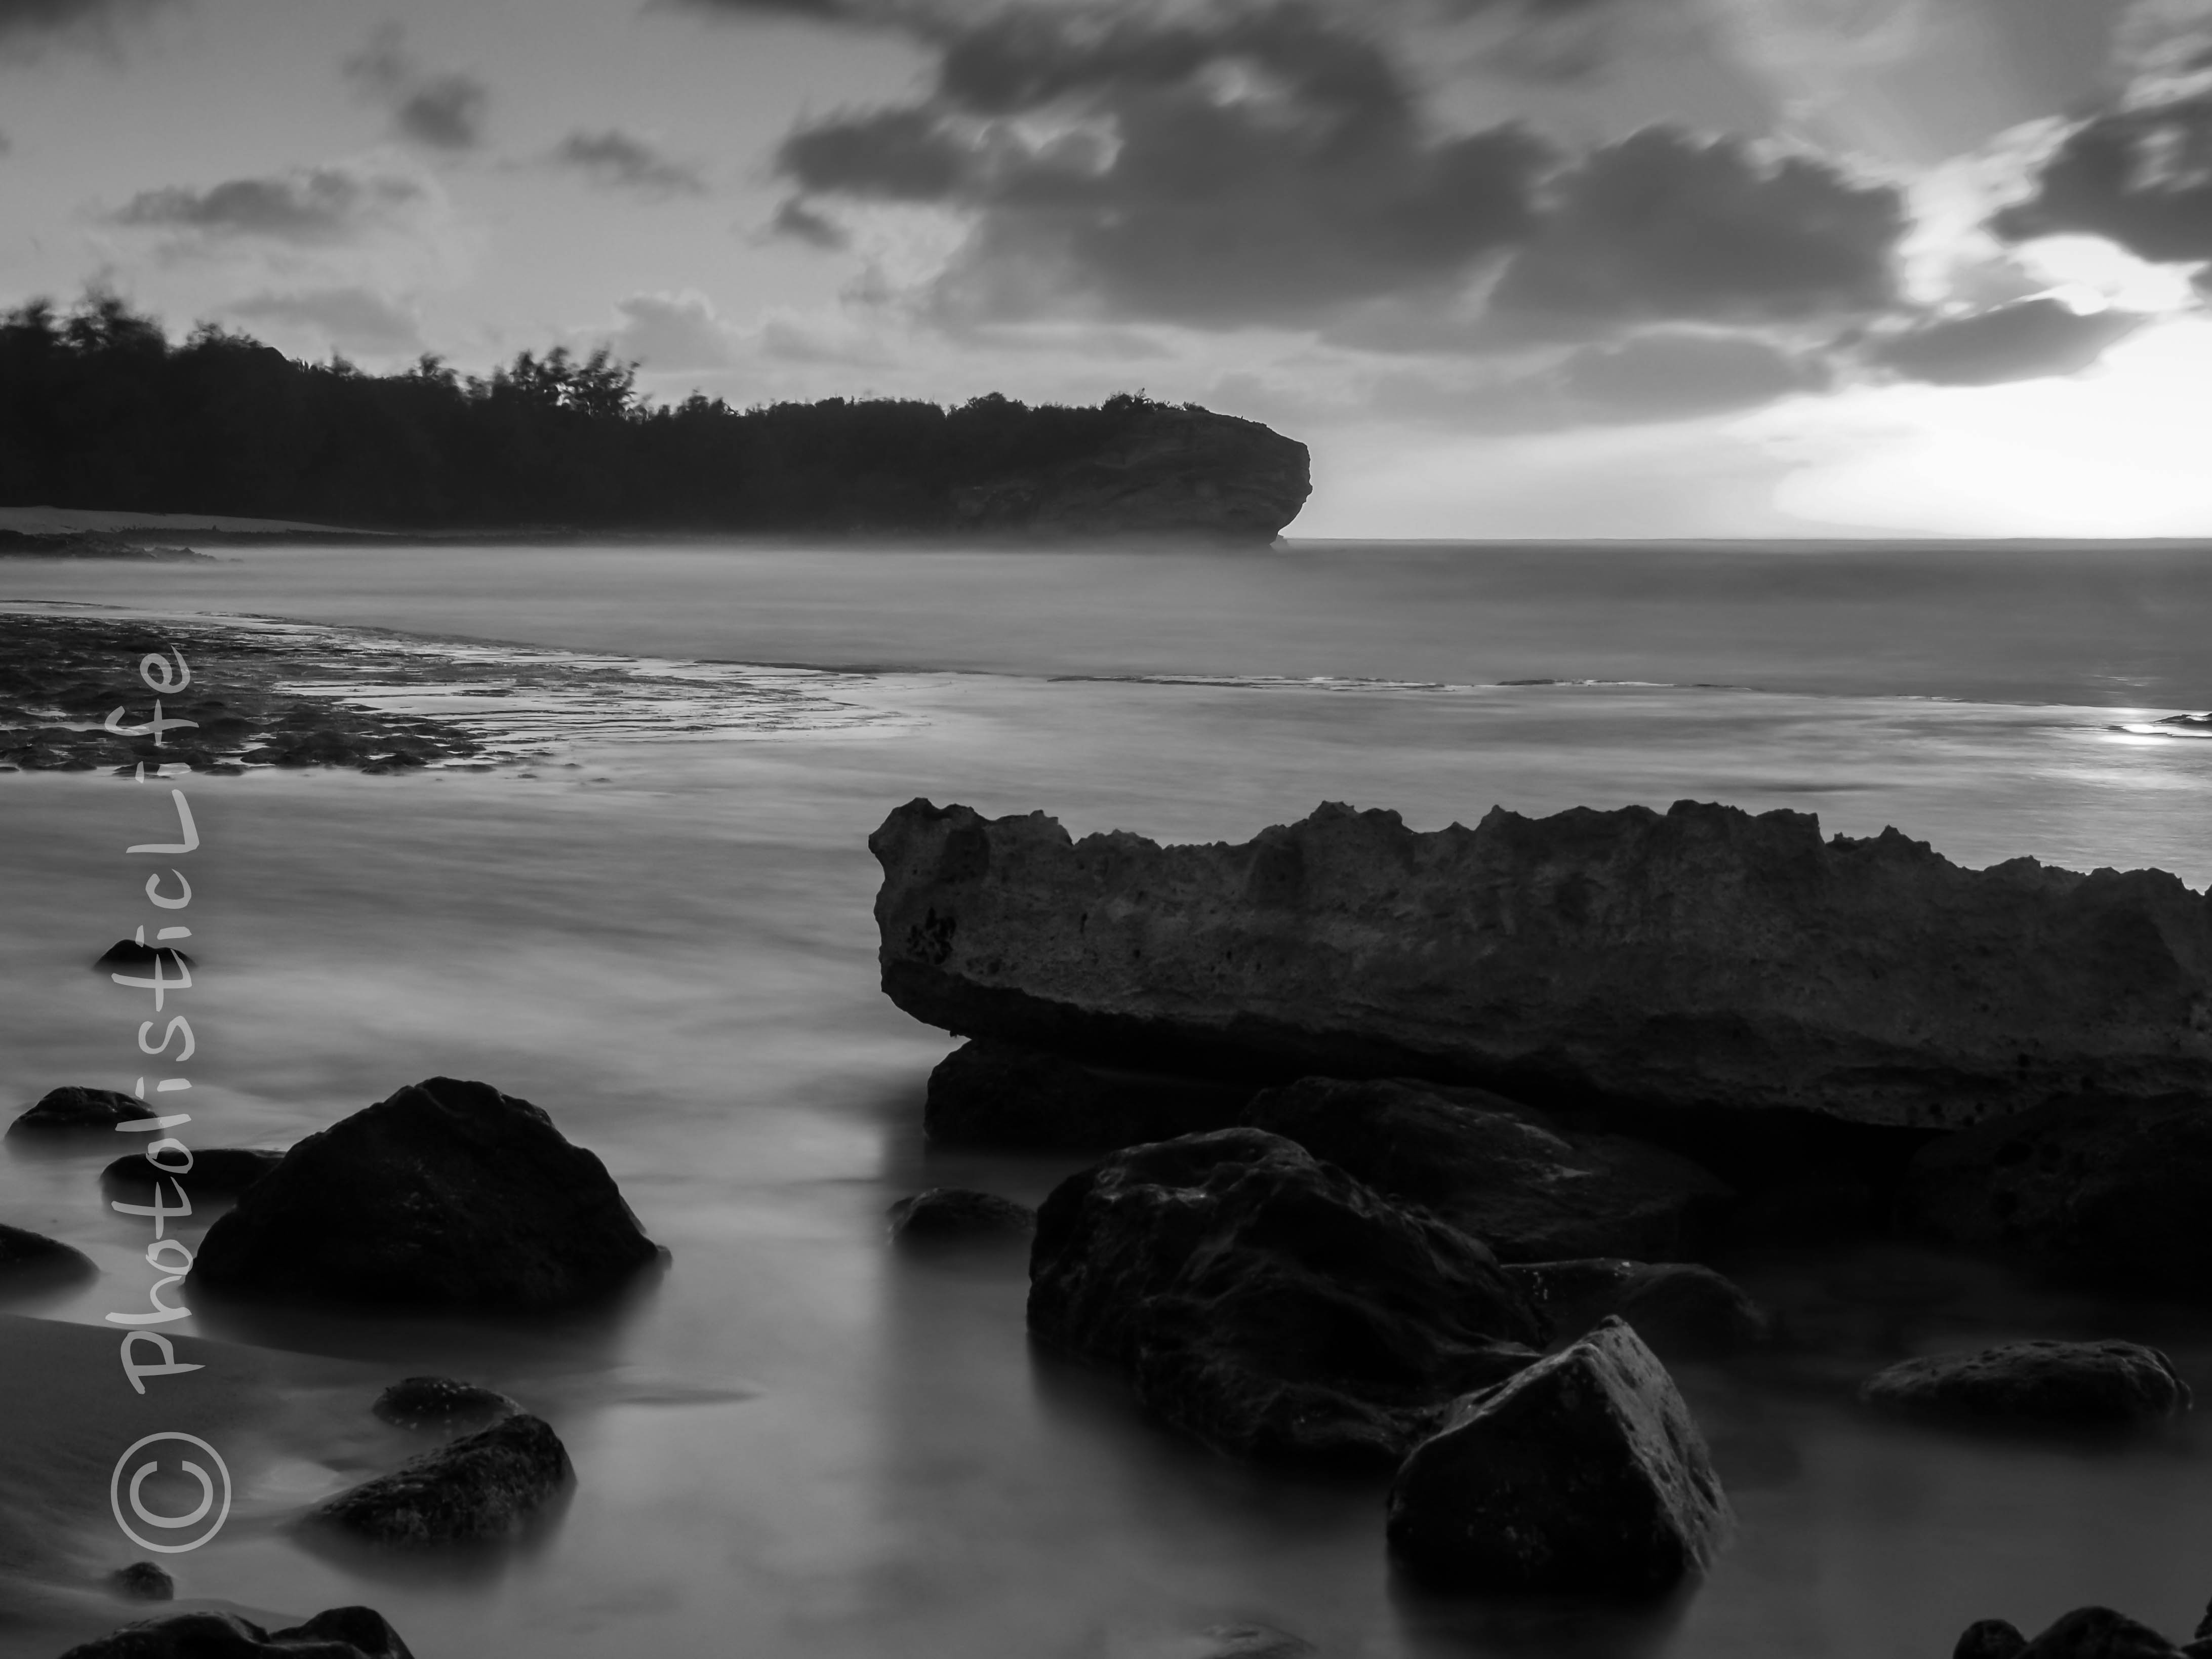
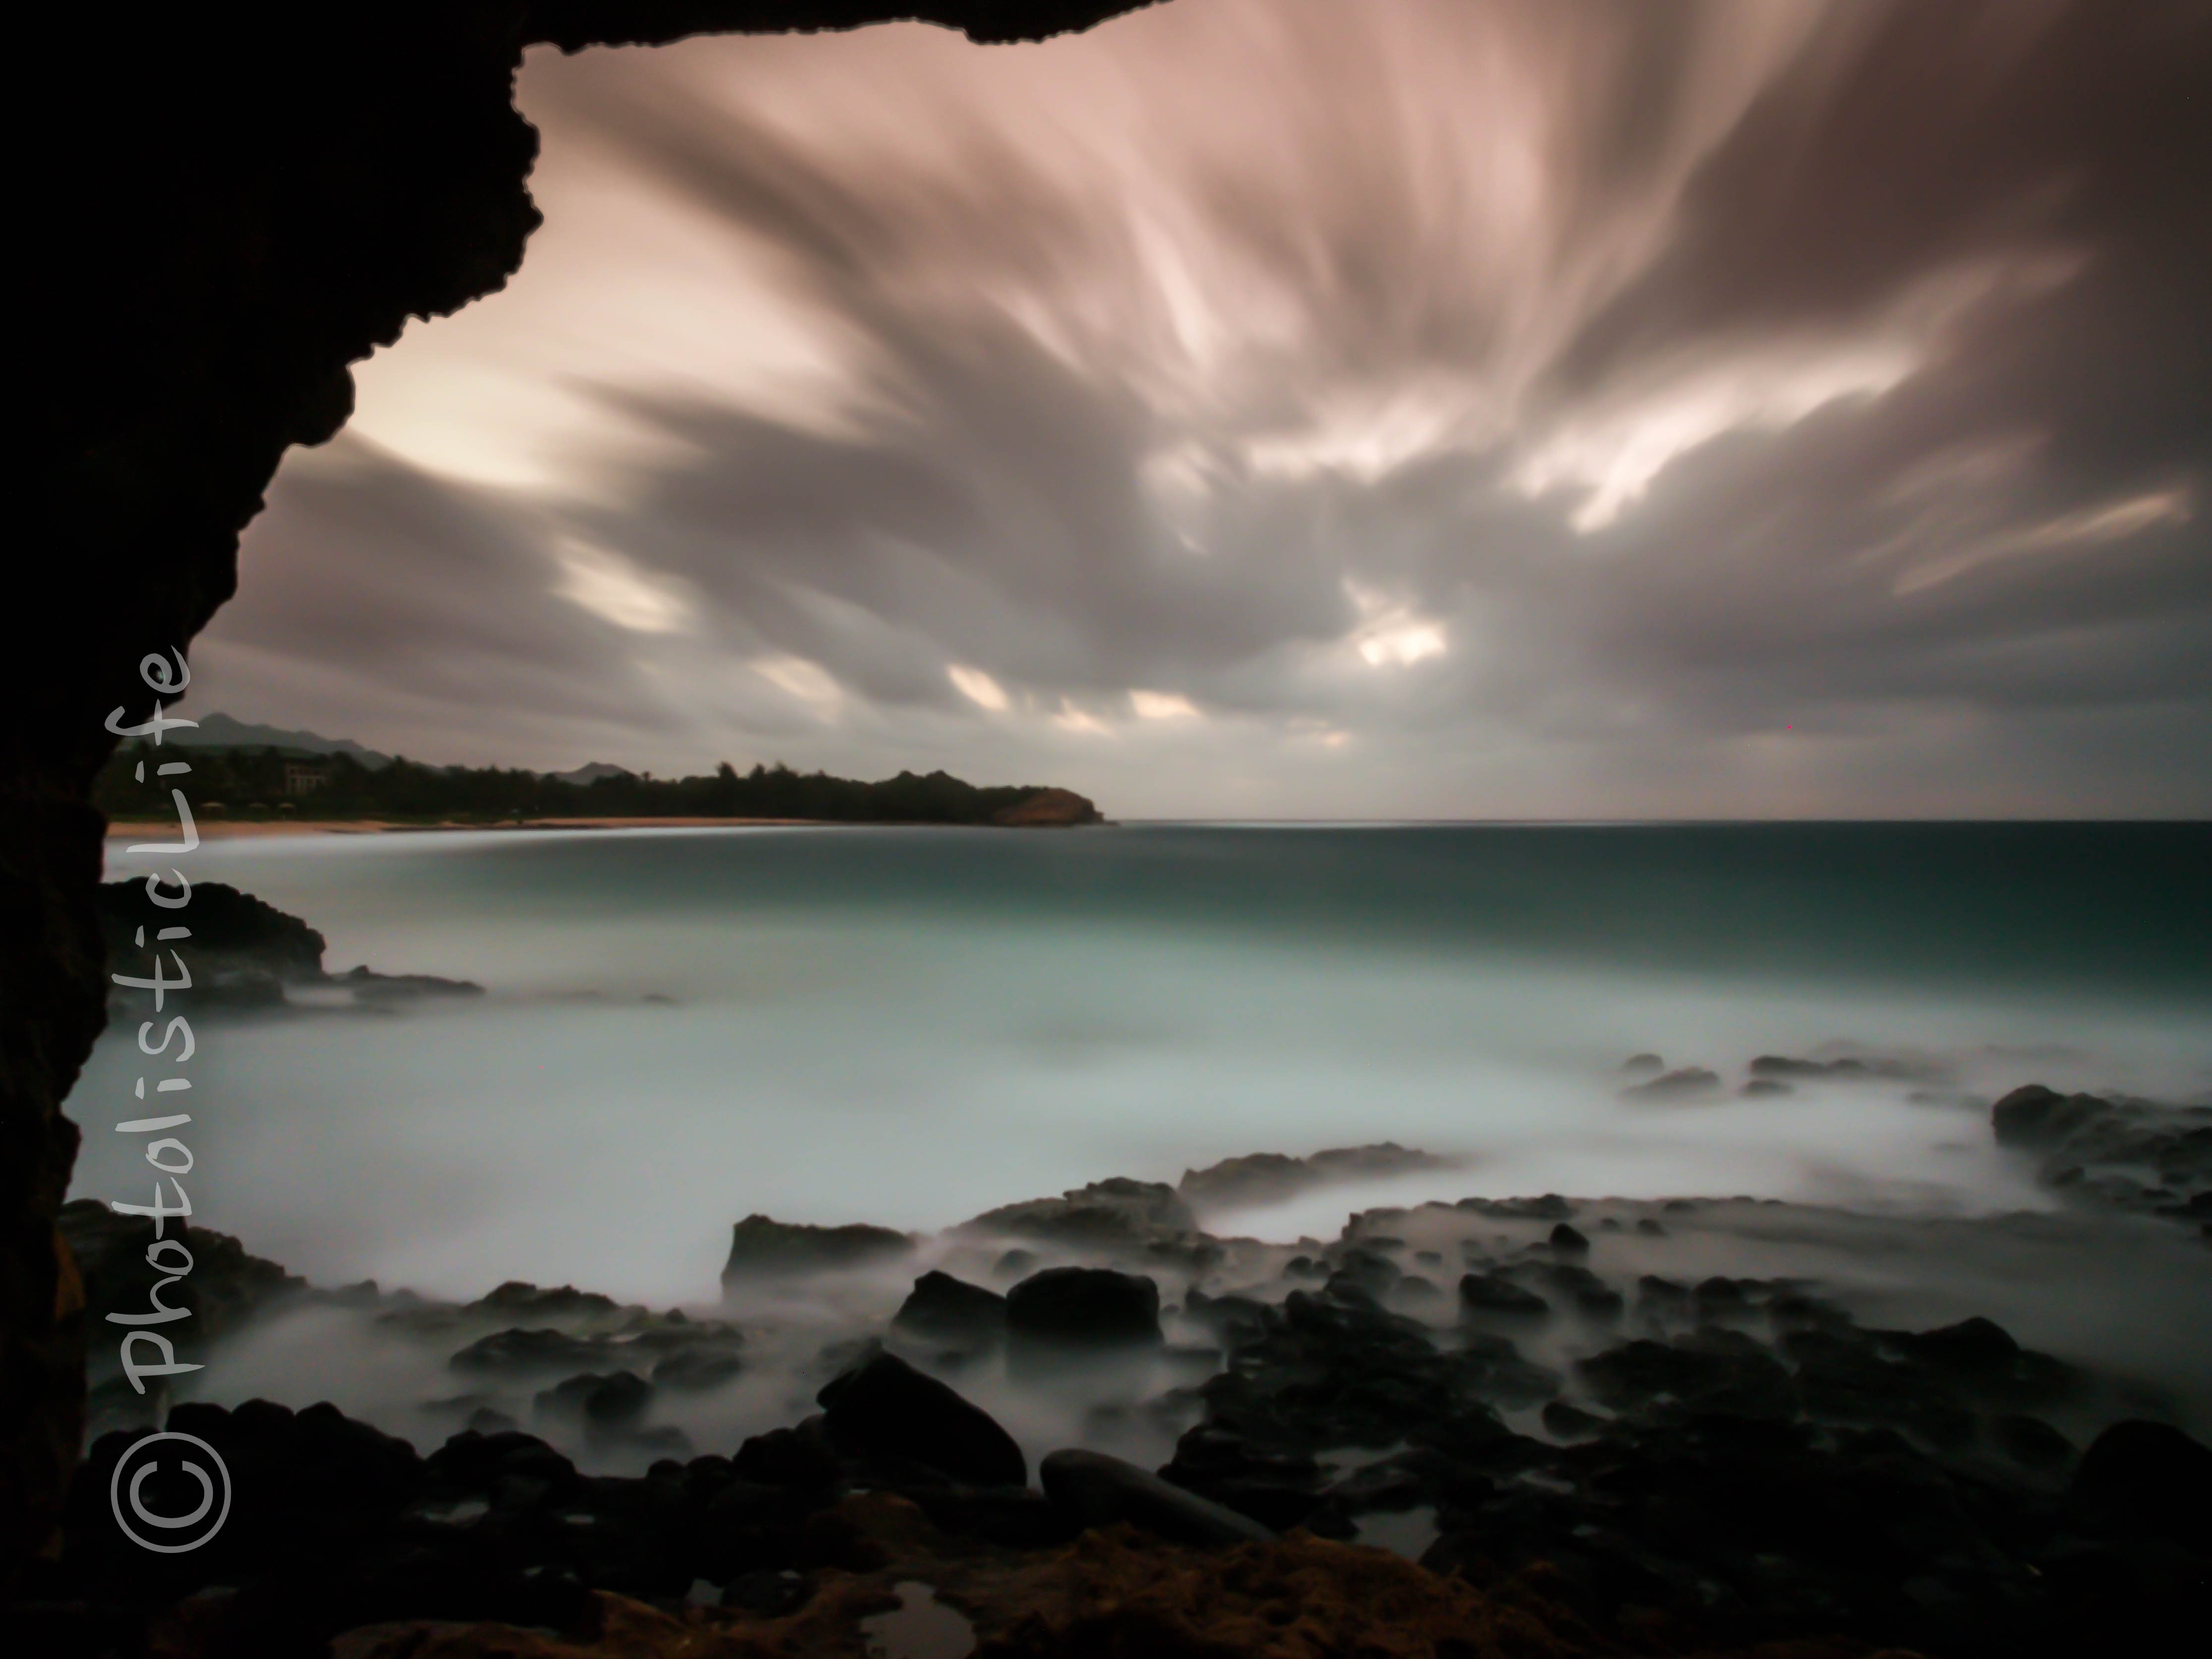
The neutral density filter is one of my favorite filters (used in the photo at the beginning of this article as well as below this paragraph). Neutral density filters give your photographs an artistic look that is impossible to replicate in any photo editing software. You are able to slow your shutter speed down on bright sunny days to capture water and cloud movement in a way that would otherwise be impossible. Think about the photographs you see where the water looks like a mist, that is a neutral density filter. Below is an example of a 10 stop neutral density filter, the camera settings were ISO 200, 12mm, f/11, 213 seconds.
Always Have a Camera
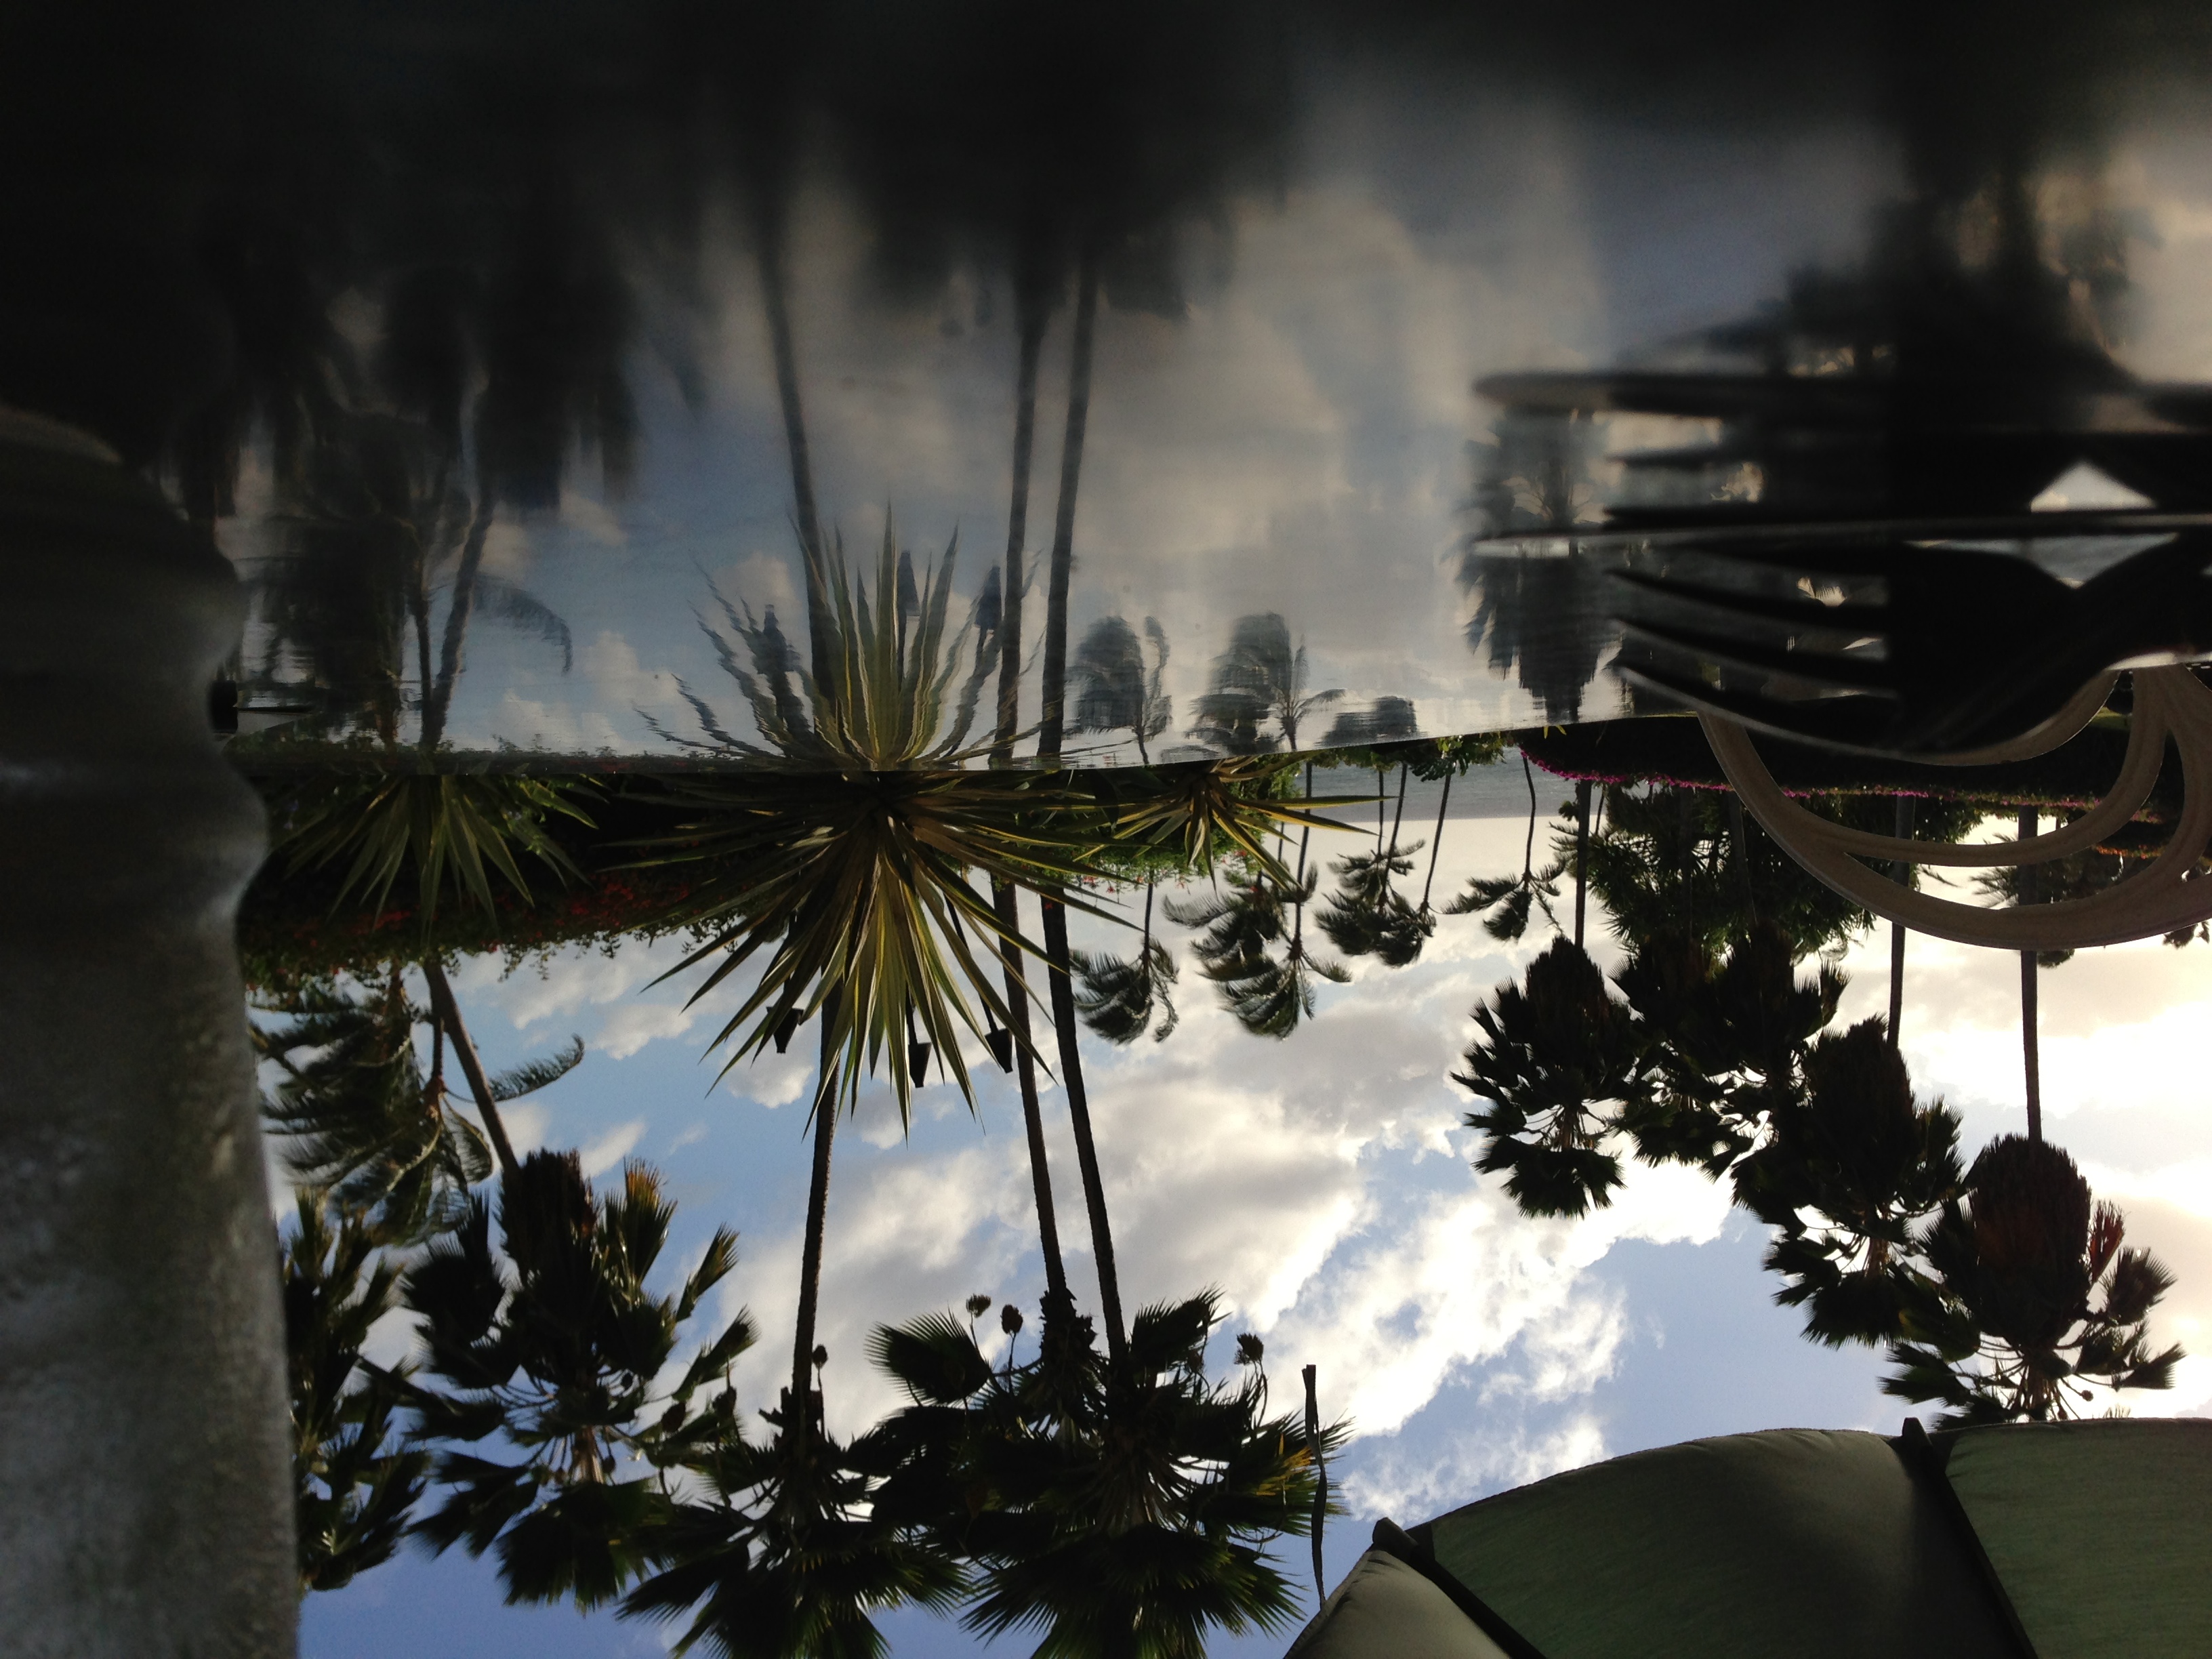
It doesn’t matter the quality of your camera, just always have one. You never know what interesting thing will happen when you’re out and about, especially if you are in a new area you’ve never visited before. The photo below was taken in Kauai, Hawaii on the way to Walmart (they really are everywhere), had I not had a camera I would not have captured this beautiful photograph. (I’ve left this photo unedited, it’s as it was right off of the iPhone camera). If you look really close you’ll see a faint second rainbow on the left… double rainbow anyone?

Get off the Beaten Path
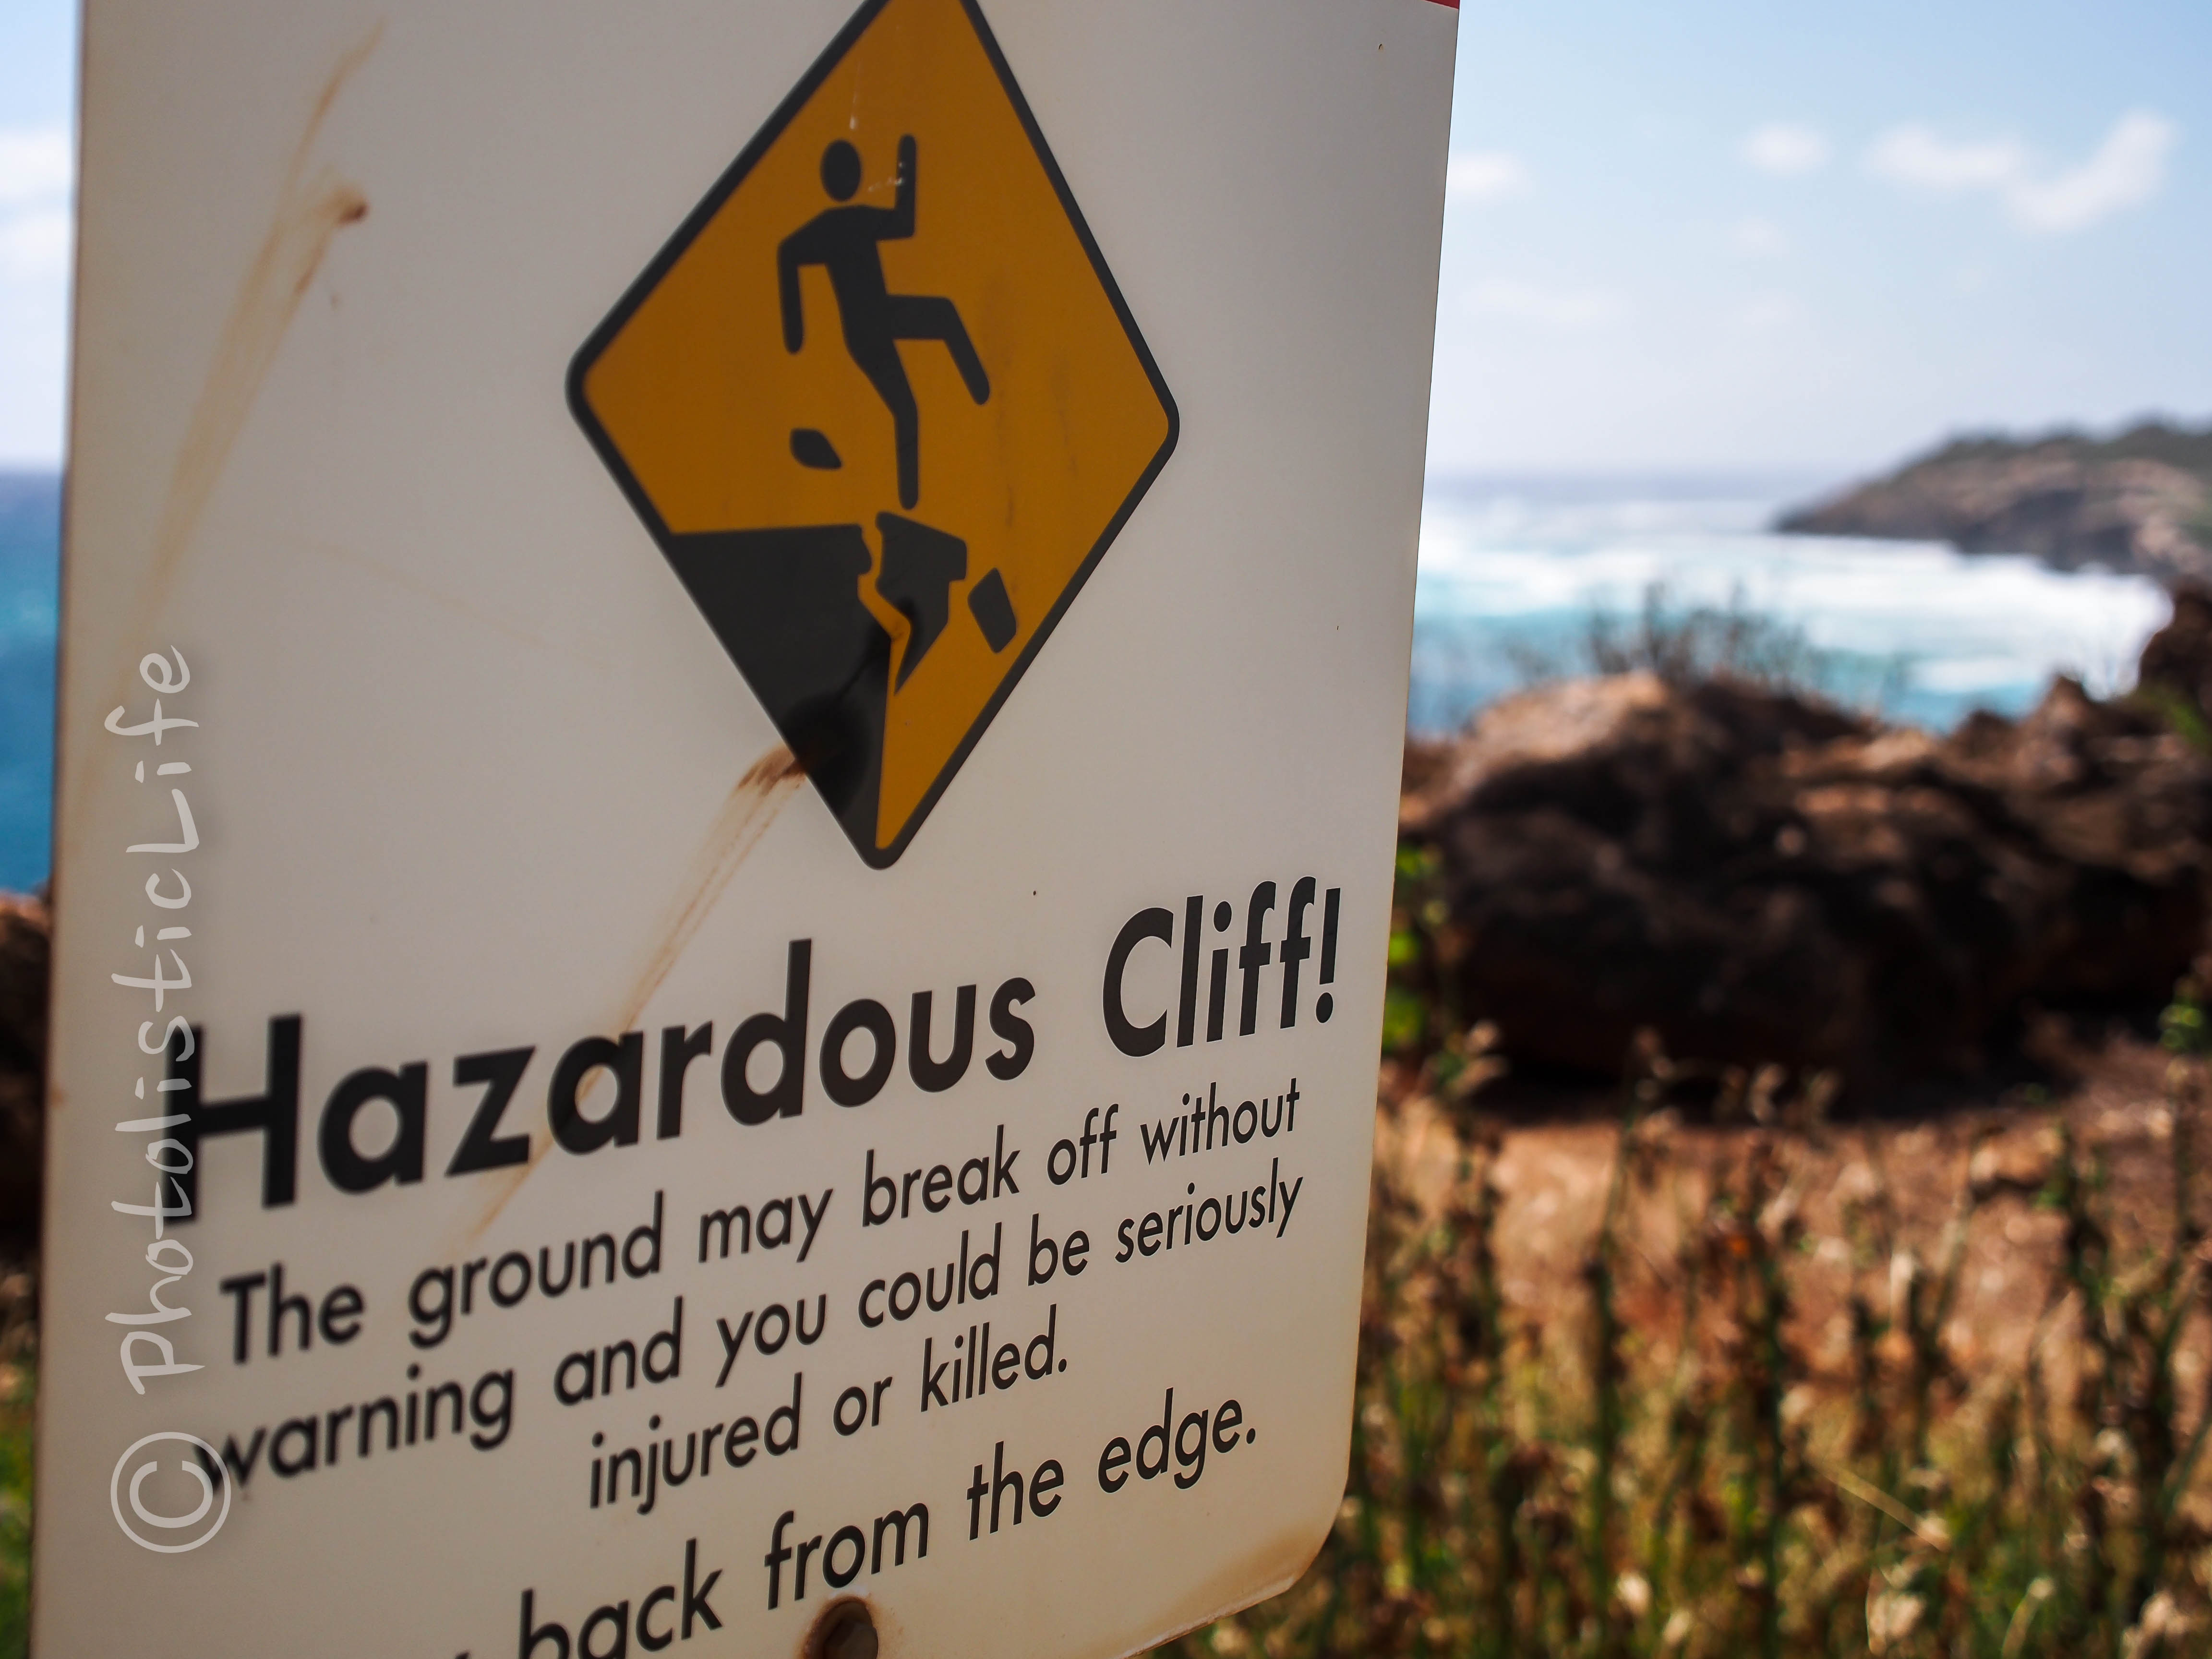
I’d lay a pretty good amount of money down on your photos looking drab if you take them from “lookouts” designed for tourists. These areas were designed in areas where there is the risk you’ll walk right off the edge while pressing your peepers (that is slang for eyeballs, pervs) into your camera. I like finding the lookouts because they show me where I need to avoid shooting from. The photograph taken from the lookout area is the equivalence of baking a cookie with a cookie cutter. Hundreds of cookies came before yours and hundreds of the same will come after. Break the mold, throw on a pair of hiking boots and get your butt off the beaten path.
That is unless you are actually taking a picture of the path… (even the photograph below was a hike (about 2 miles from tourist area) up a “hazardous cliff” trail.
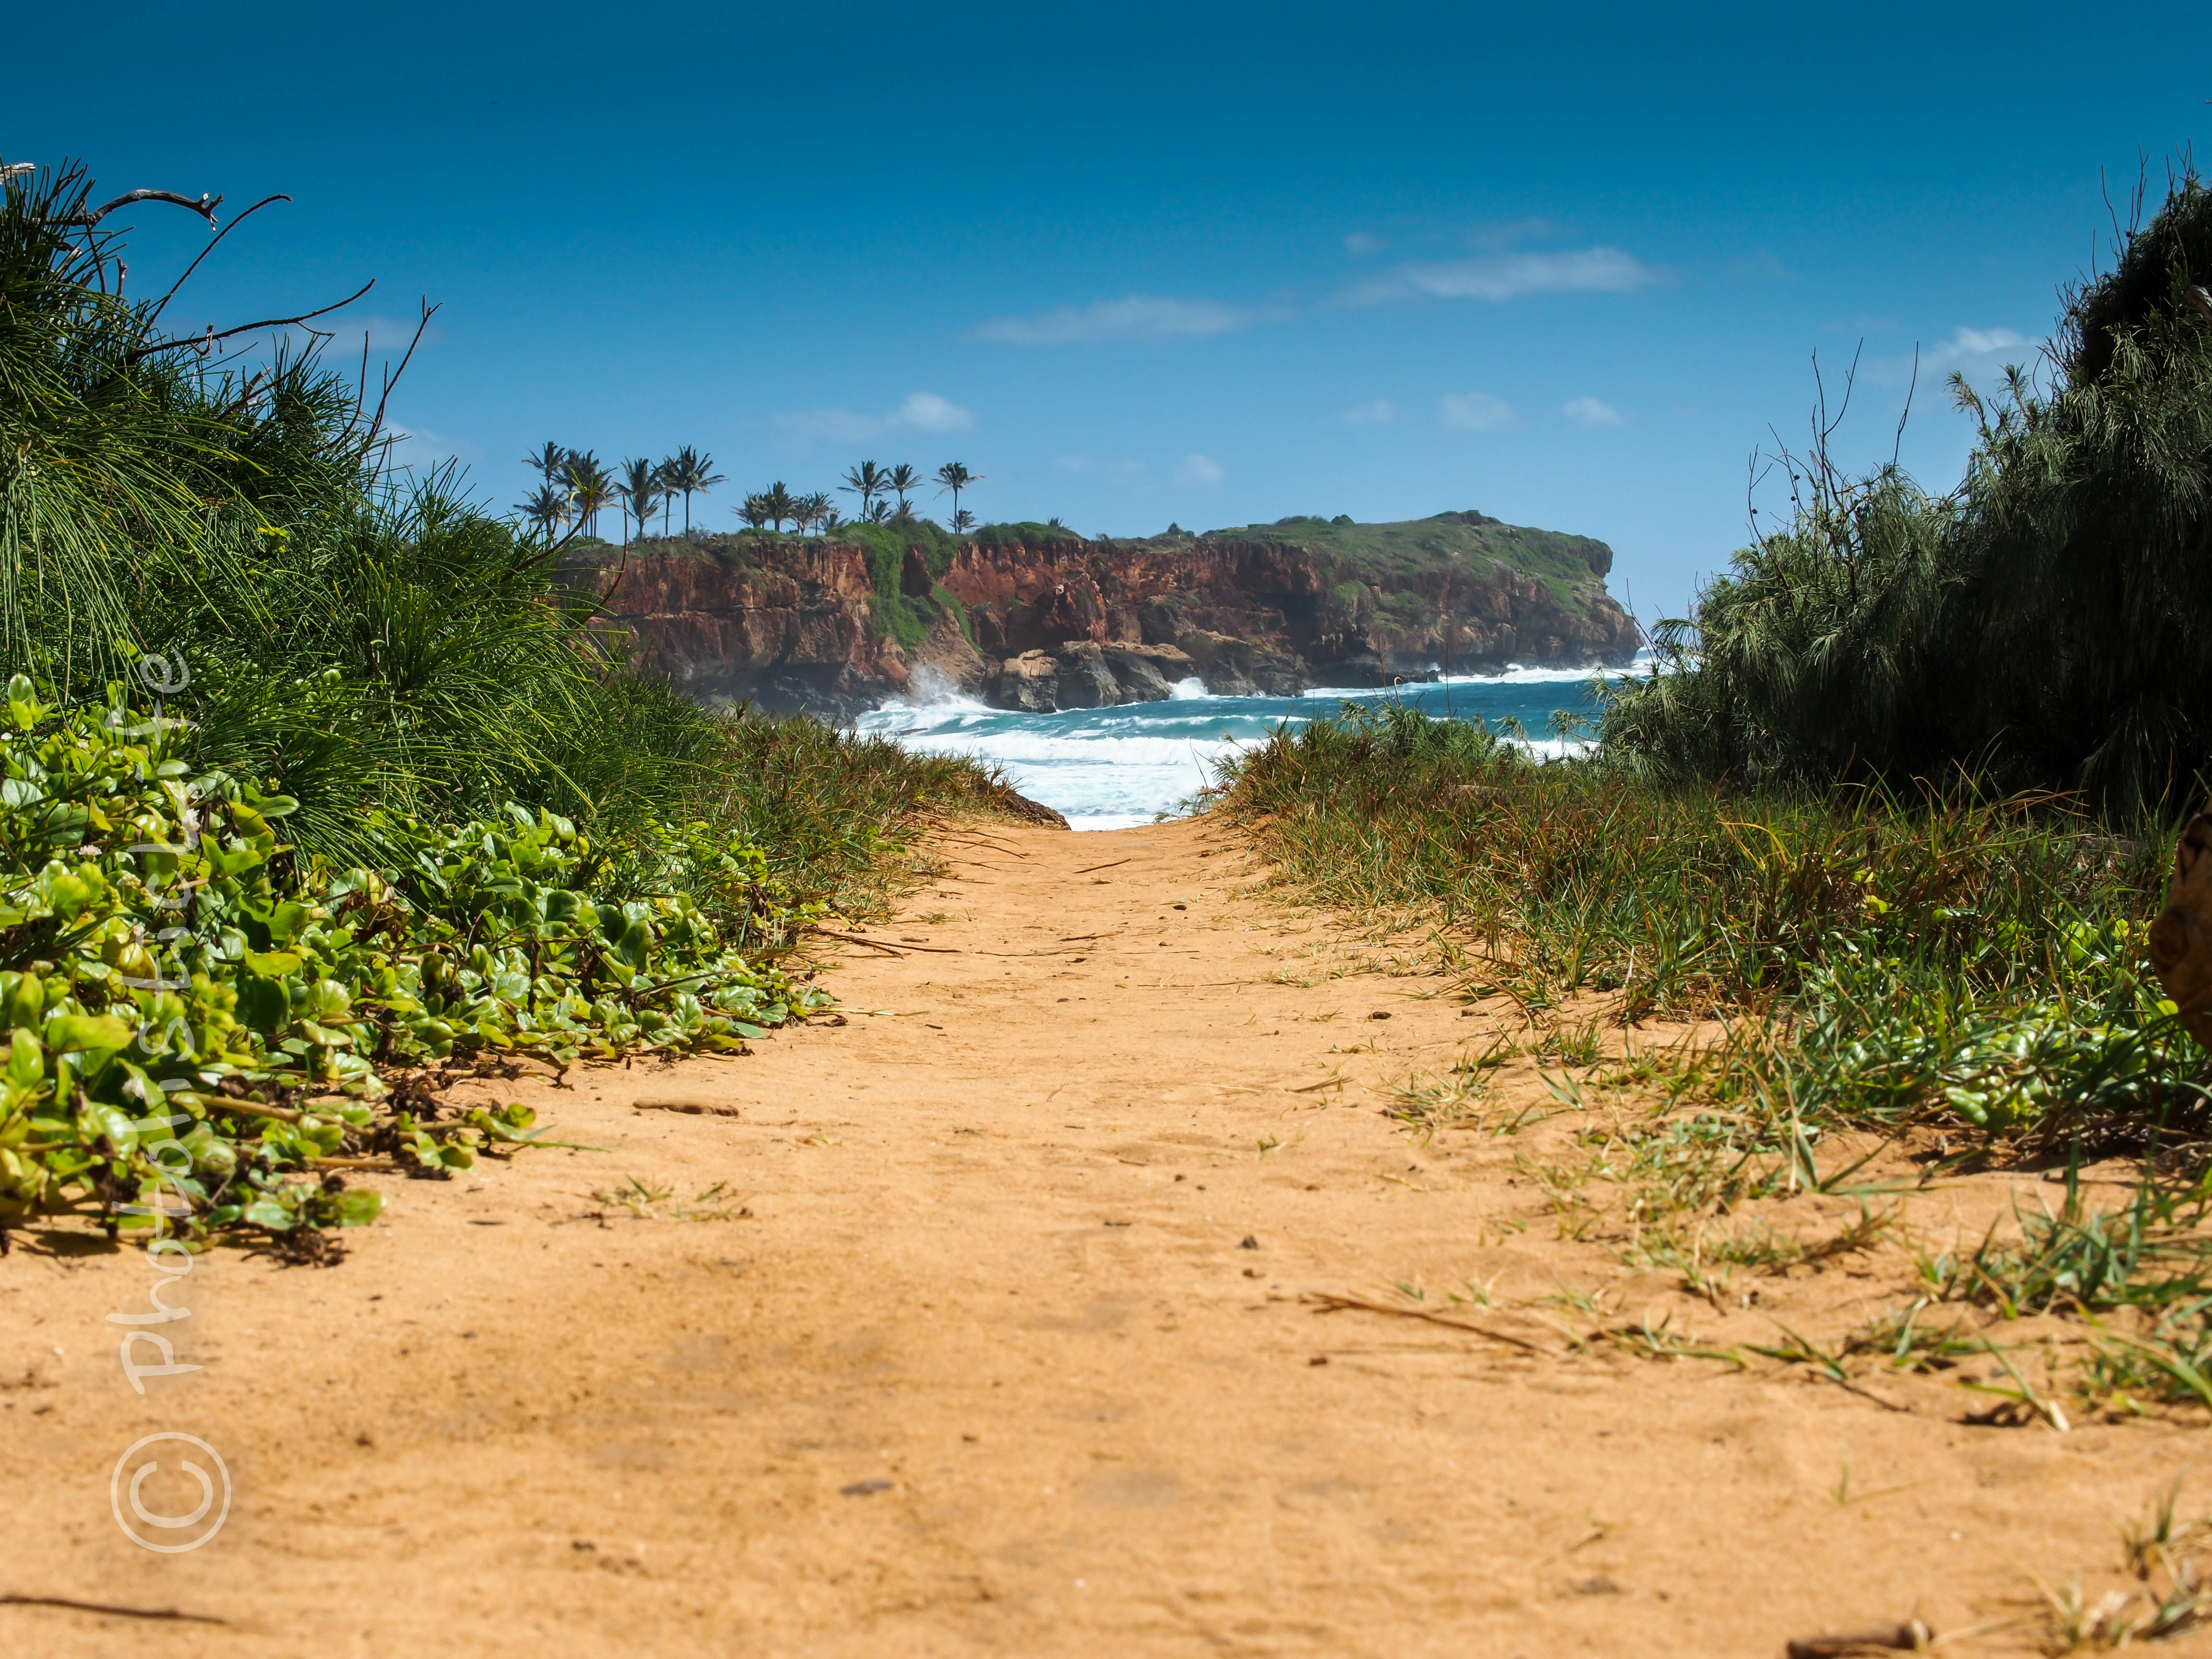
The long exposure photographs, path photograph, as well as the hazardous cliff photo were taken with the Olympus OM-D E-M5 and the Panasonic H-HS12035 LUMIX G X VARIO 12-35mm/F2.8 ASPH X Series Lens
. The OMD is hands down the best travel camera I have come across and there are only two professional micro four thirds lenses available for it, the 12-24mm is one of them. If you’d like to learn more about the Olympus camera you can read my review titled Best Travel Camera. The rainbow and outdoor dining photographs were taken with the iPhone 5.
Did I miss anything? Please feel free to share in the comments below.