
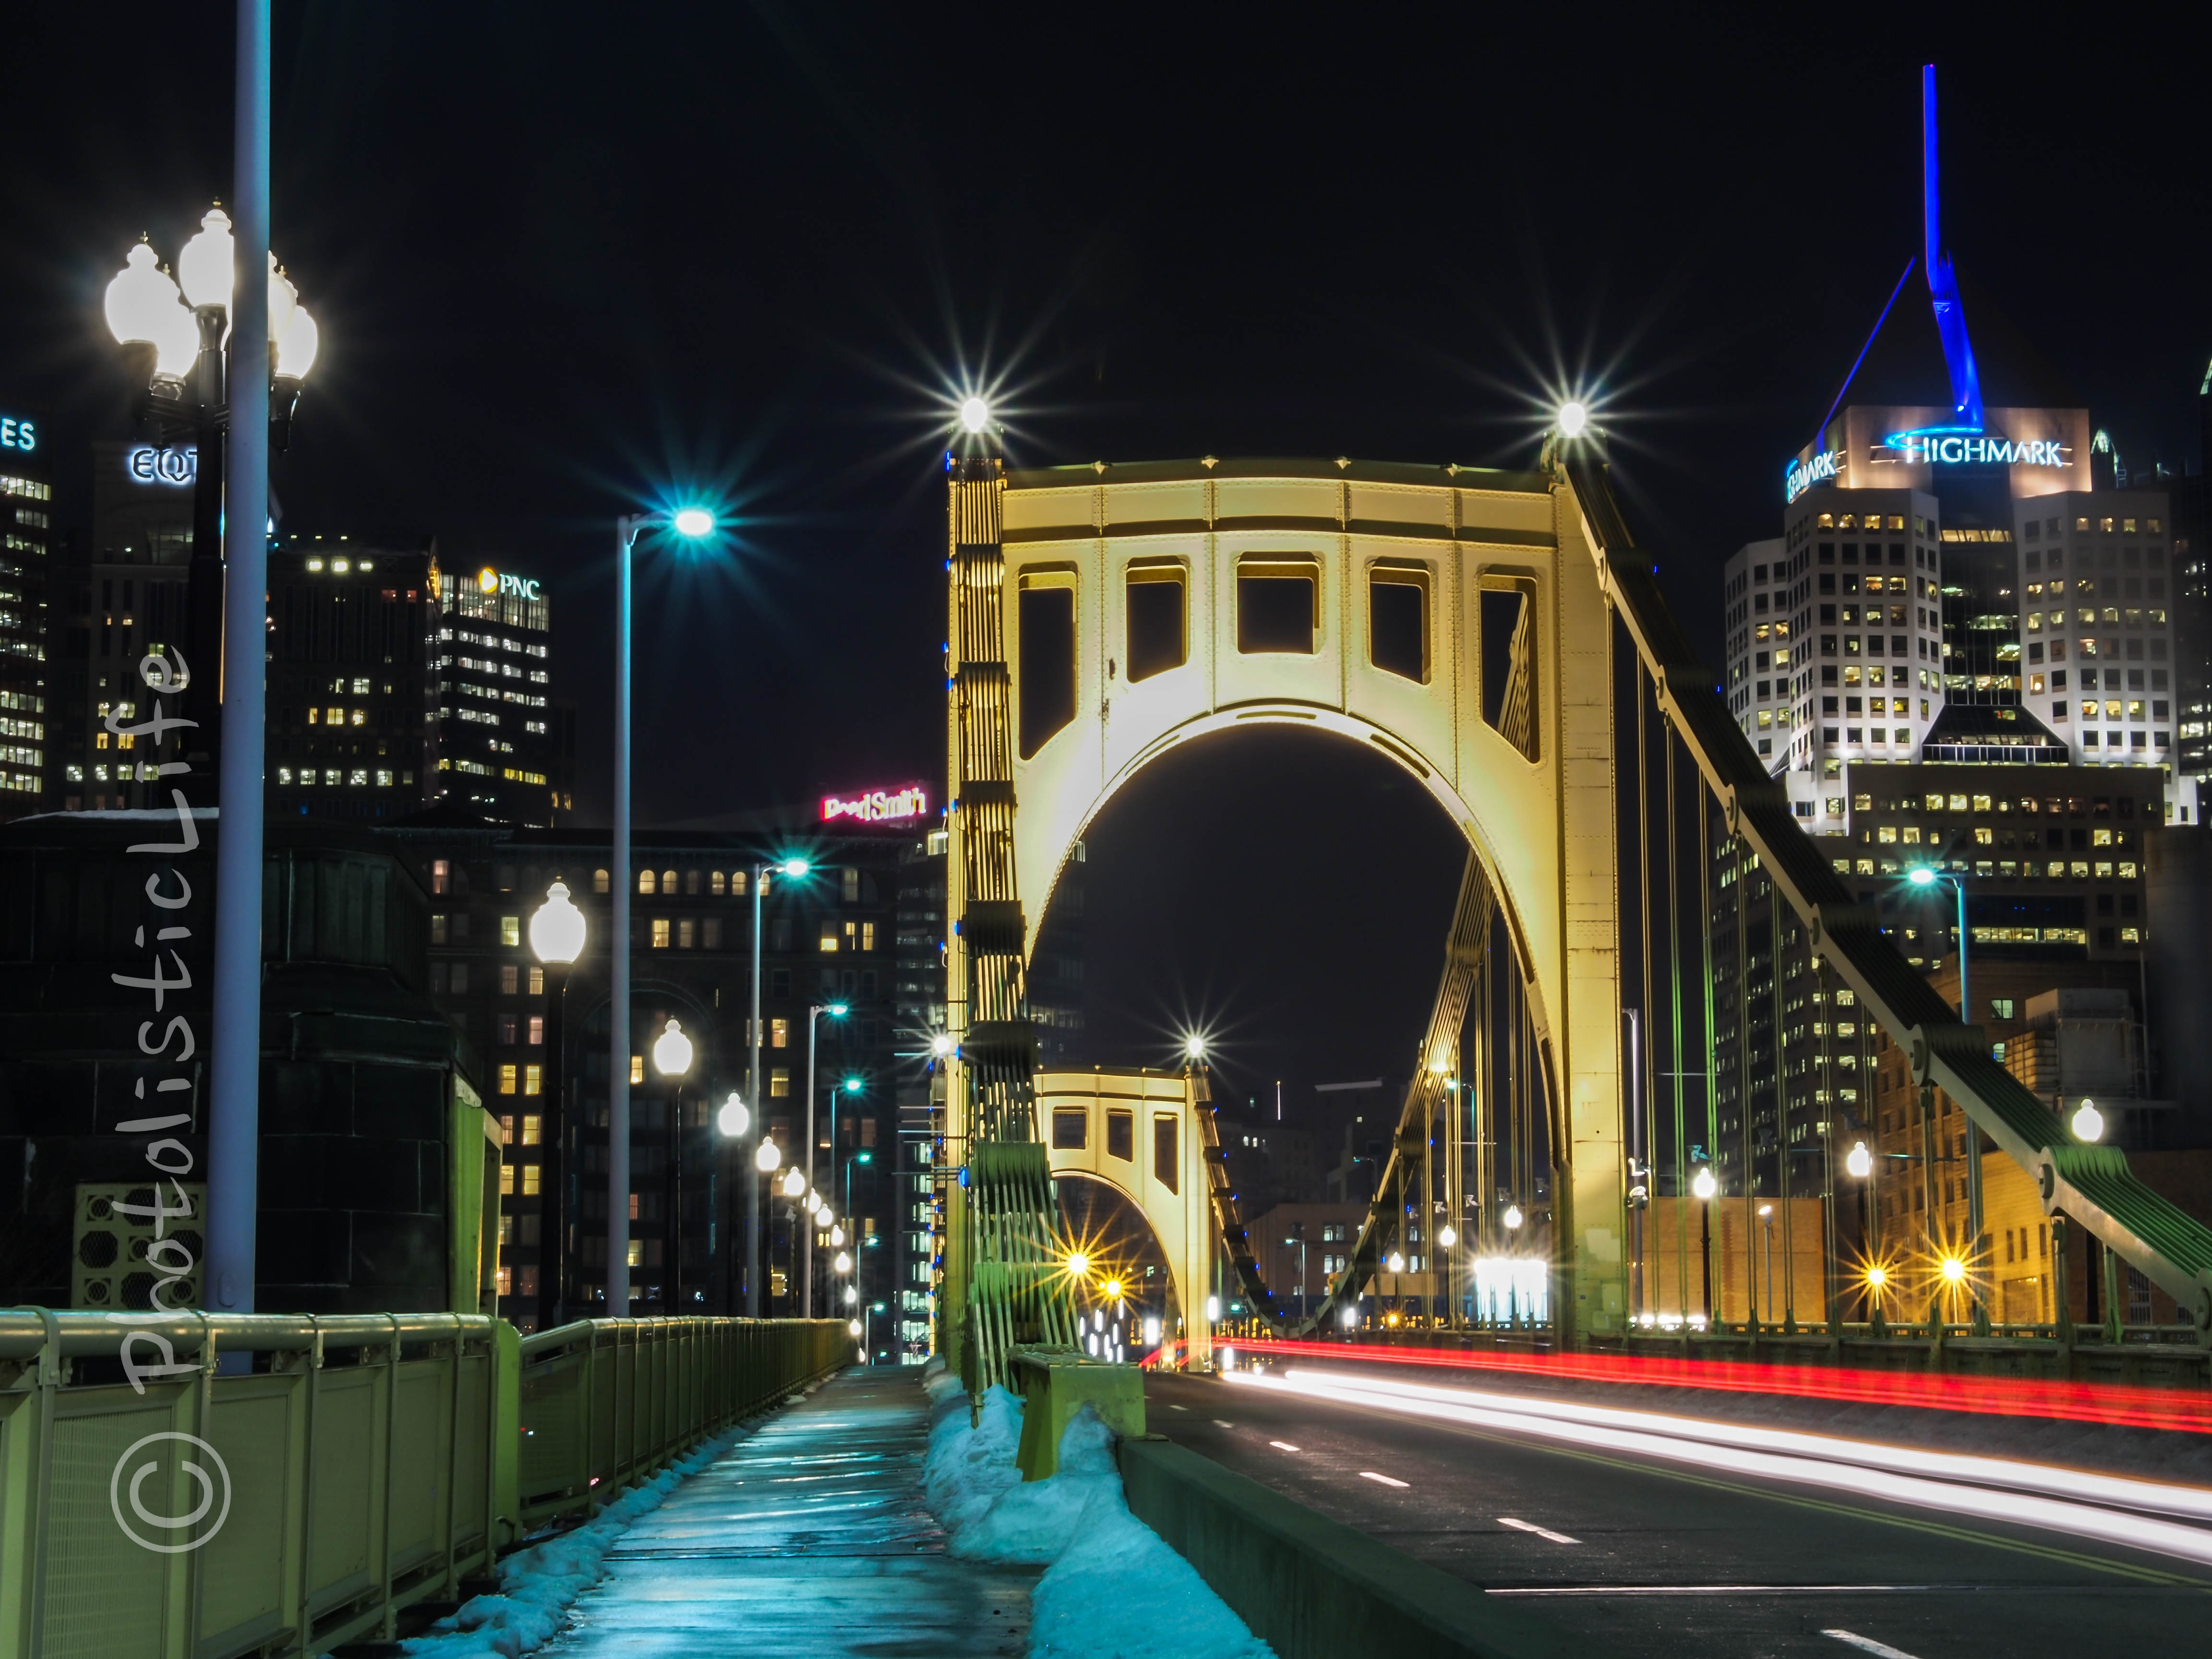
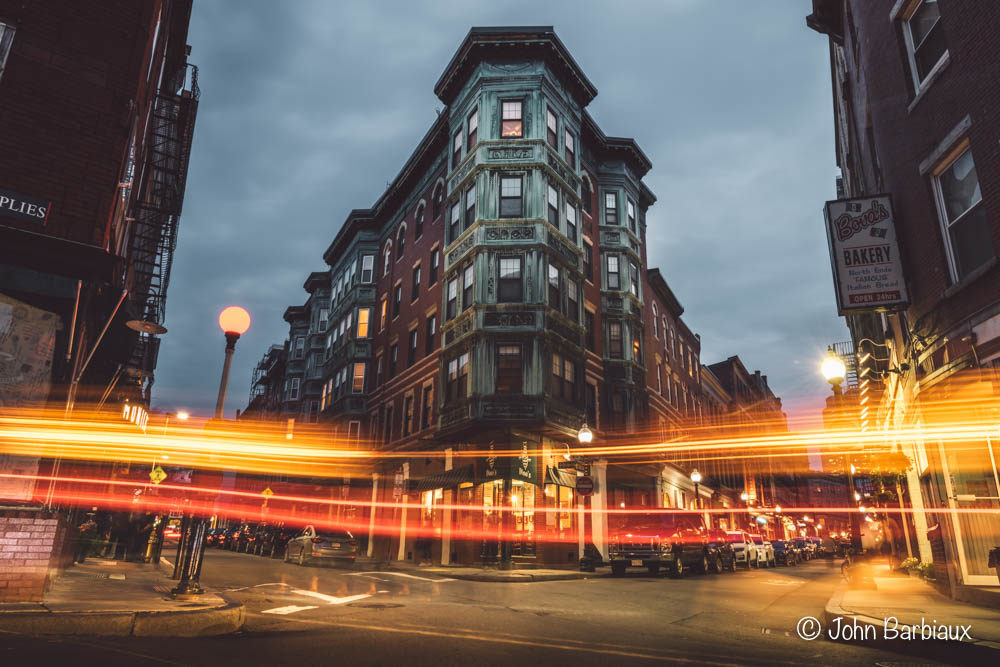
Making it through a night of photographing the city without getting mugged? Check! Capturing a light trail while photographing the city? Check! Achieving nice star burst effects around lights? Check! Getting all three in one image? Priceless. Composition is only one element (granted, a super important one) of your night photography endeavors. There are a couple of ways to enhance your photograph without adding an art filter or lens filter to enhance your star bursts.
What You Will Need
There is a complete comprehensive guide to night photography you can peruse at your leisure so I will keep this brief. For the shot above you would only need three things… Camera, tripod, and quality lens. Optionally you could bring your cell phone, I would highly recommend this if you’re photographing by yourself at night.
Light Trails
The first thing you can do to really enhance your photograph is to add a light trail or several hundreds. The light trails are created by cars head and tail lights moving through the frame as your shutter is open and recording the light onto your image sensor. If you want a nice long light trail, set your shutter speed to 20 or more seconds. If there are street lights that cause the image to be over exposed just decrease the aperture (higher f/number) to block out more light and allow you to decrease the shutter speed. Which brings us to the next topic… Star bursts.
Star Bursts
If you’d like to achieve nice star bursts in your photos you’ll be happy to know it’s not a difficult task. The quality of your lens will determine the quality of your light bursts. The light bursts are created by diffraction, if you’re wondering what in the world diffraction is then read my article about diffraction and it’s effects on your photographs. The number of star burst points around the lights in your image will be determined by the number of blades your aperture has (there is an exception for odd-numbered aperture bladed lenses, they will have double the number of star points to aperture blades). The size of your aperture will also have an effect on the quality and size of the star bursts, the smaller the aperture (larger f/number) the bigger the star bursts. If you’d like to reduce the size of the star bursts then increase the size of your aperture (lower f/number).
For the gear heads out there, here is the gear I used for the image above:
Related Links
Night Photography Guide
Panasonic 12-35mm f/2.8 – Best Lens for the OMD EM5
Diffraction and your Digital Photographs
How to Shoot Macro Photography
Thank you for taking your time to write up these informative articles. As a beginner I have SO much to learn and it is hard to keep it all in mind. I think I need to make some cheat sheet type notes to carry with me. Love photography ..both taking photographs and looking at them!
My pleasure, thank you for your feedback. I enjoy writing these up as much as taking the photographs.
I really like the star bursts in this photo. And you didn’t use a filter. Nice! And I agree with Roshan. Your articles are very good and very informative. Thanks.
Thanks Liz, I love the positive feedback. Taking that photograph was cold and rewarding, I should have had something hot to drink/hold… my tripod was freezing my fingers.