

Photographing flowers is a lot like photographing lions playfully pouncing on one another except completely different. You have plenty of time to compose your photograph because the flower is not going to uproot itself and walk away at any second. And if it does be sure to get a photo of that, otherwise you’re a terrible photographer. Flower photography is not only beautiful it’s also a great way to really work on your photography technique and try some things out with DOF (depth of field… or either blurring or keeping in focus the background) that maybe you wouldn’t think to try otherwise.
What type of lighting?
Let’s keep things simple. You could use a flash if you’d like but I have found that a traditional on camera flash creates a pretty harsh and unnatural light on the flower and sometimes blows out the highlights so we are going to talk about natural lighting. Most of the time the natural light will be more than enough and you’ll find that photographing on overcast days actually creates more beautiful flower pictures because the detail is preserved while there are no big shadow or highlight issues. Now if your just shooting flowers as part of a composition of a larger landscape picture a clear blue sky may be ideal.
If you really love flower photography then I’d recommend you invest about $100 into a quality reflector like the Westcott Photo Basics 304 5-in-1 Reflector Kit because it’s versatile and will help every facet of your photography. If your unsure how it works don’t worry, it’s pretty straight forward. You can direct the reflector at the flower of your choice and redirect some sunlight right onto the flower. The nice thing about this approach is that you can see the effects of the reflection right away as opposed to using your camera flash and only being able to see the results after you’ve snapped the shot. If your really feeling creative you can take the reflector cover and hold it behind the flower giving yourself a black background and isolating the beautiful bright colors of the flower for a great contrast.

What Camera Settings?
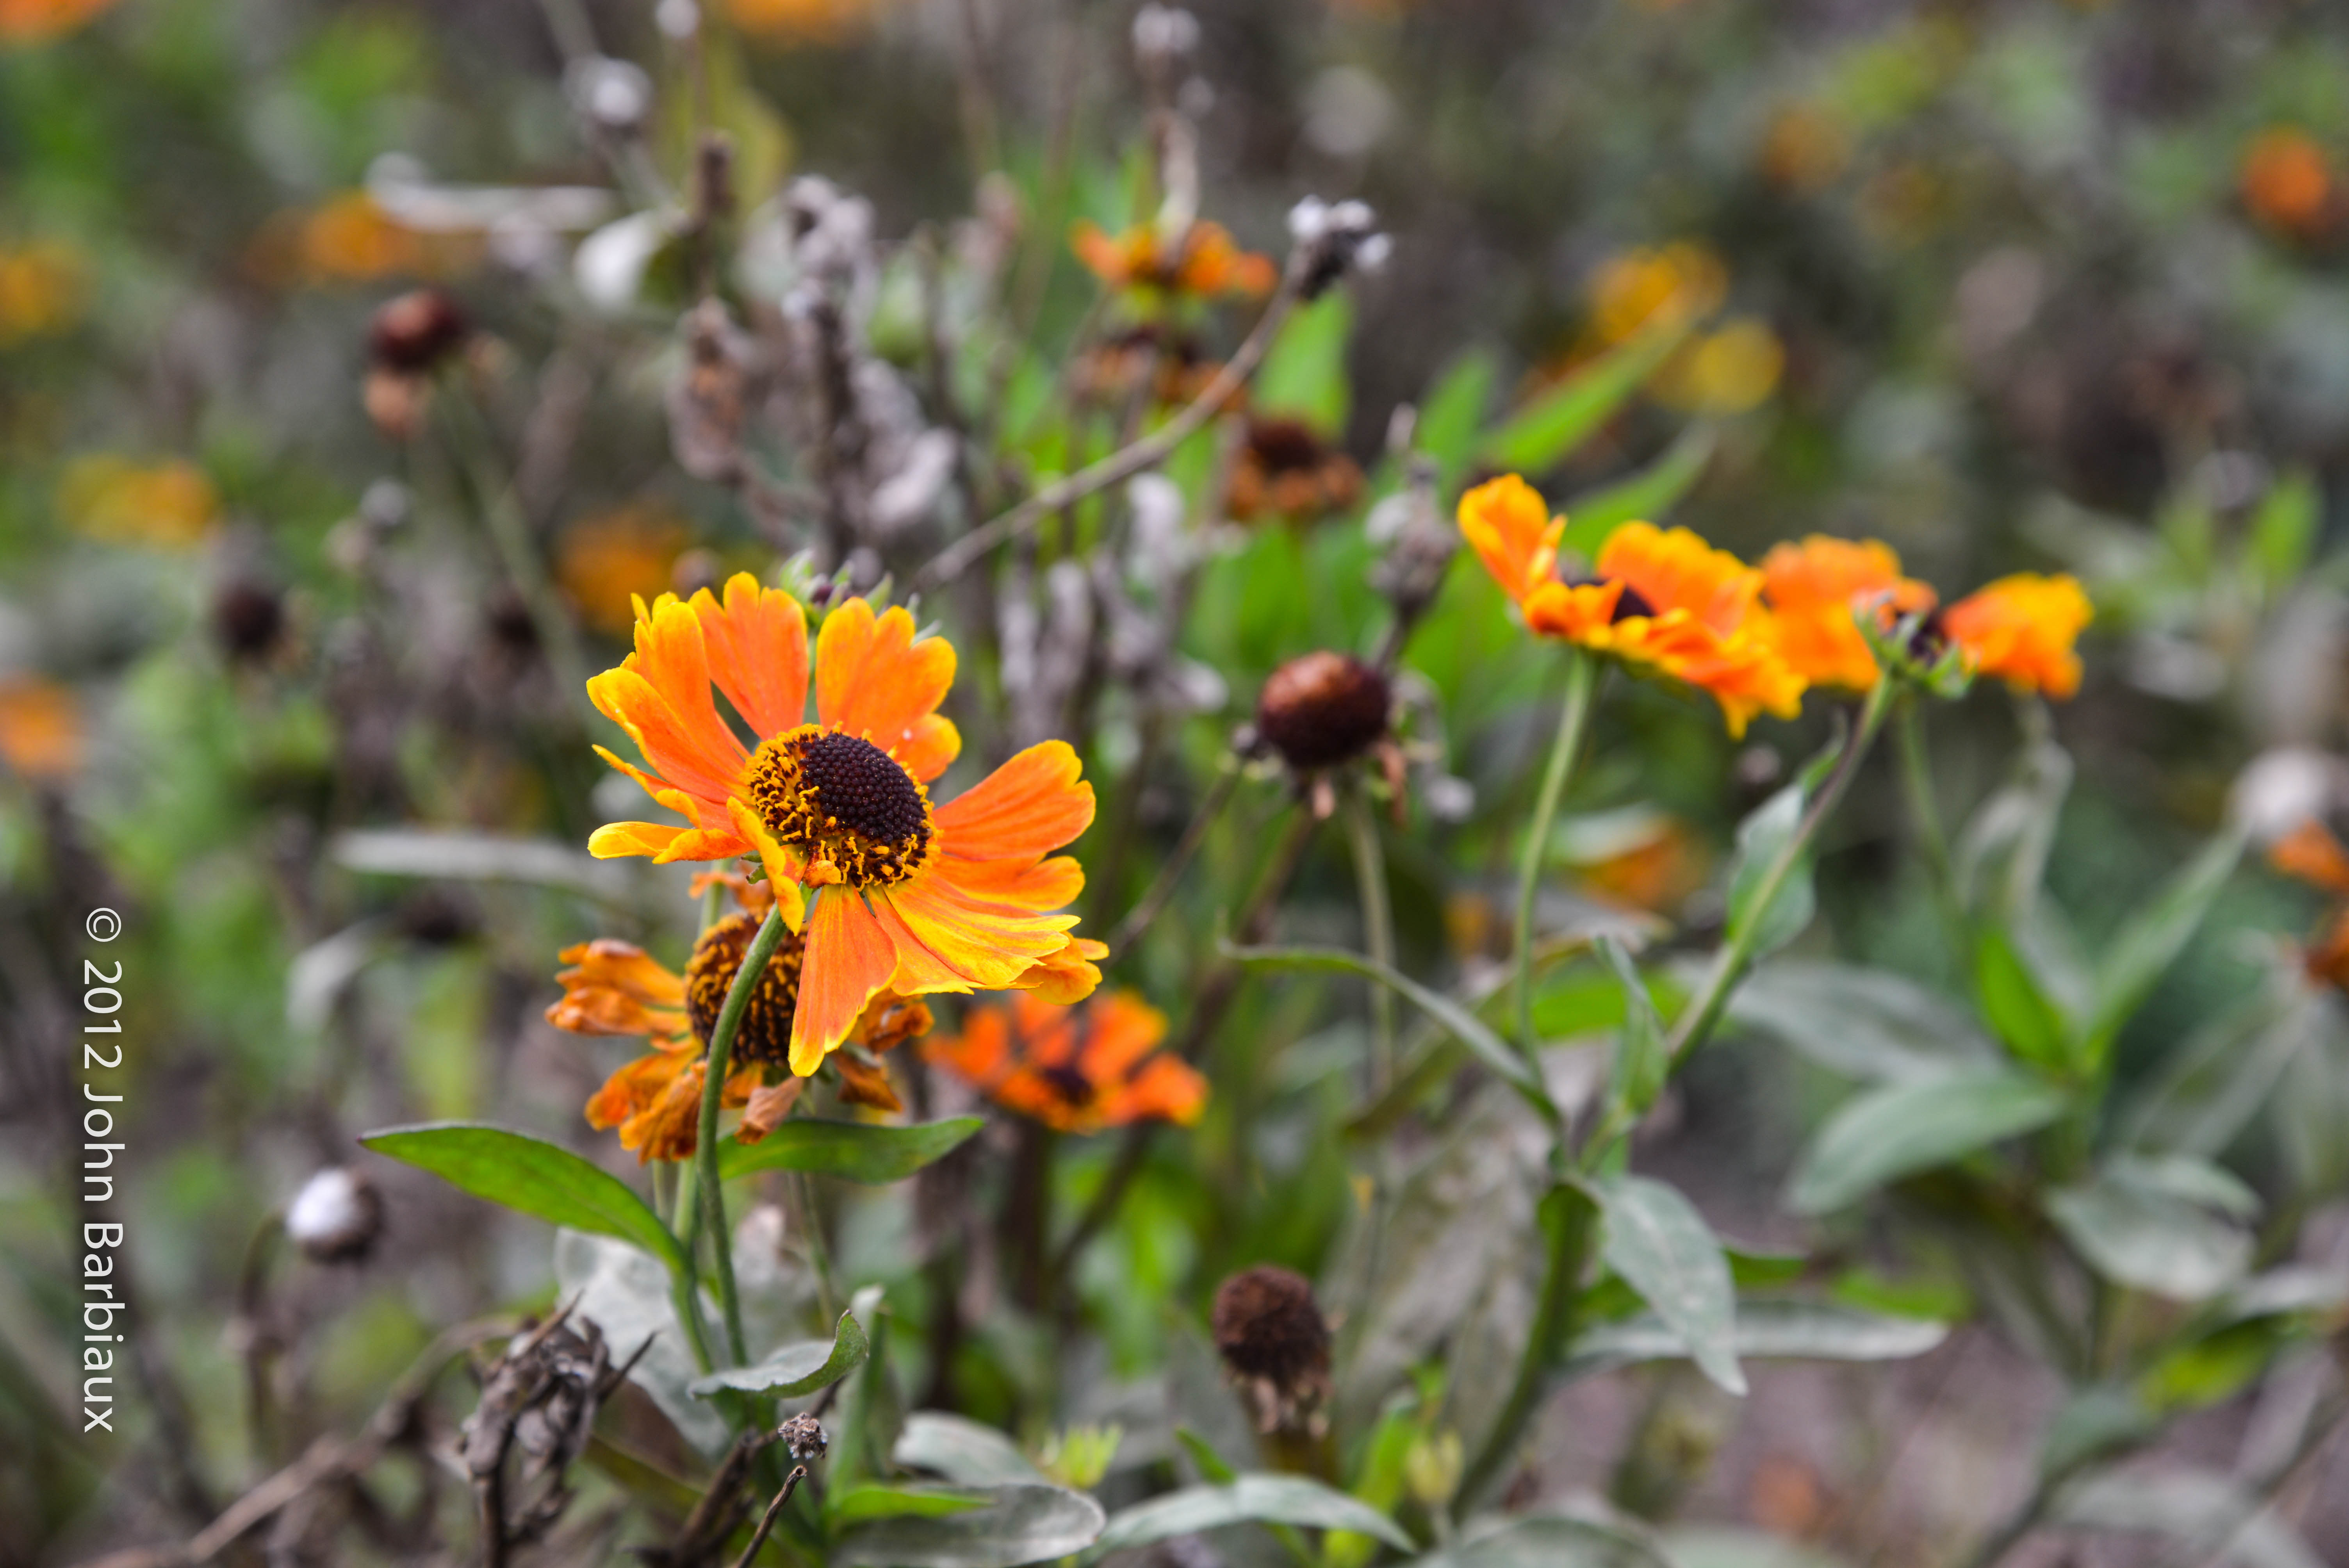
Photographing flowers in manual mode is a great idea. If you’re not real familiar with the manual mode on your camera this is a great no pressure way to learn. If your shooting hand-held the general rule of thumb is to set your shutter speed to a stop faster than the length of your lens (if your shooting with a 50mm lens then set your shutter speed to 1/50 of a second). If you’re using a tripod then you can set a slower shutter speed and use a remote to trigger the shutter so your potato wedge finger doesn’t shake the camera. The photo of the orange flower at the top of the post was taken with an aperture of 6.3 while the pinkish/purple flower was shot at f7.1. So why the big difference in depth of field? The first shot (with the orange flower) was zoomed in to about 85mm so the incremental decrease (widening of) of the aperture gave a blurrier (bokeh) background. Long story short, if you’d like better bokeh (blurred background) then try zooming in while opening (lower number) your aperture. If you have a very fast lens (a lens that has a low f-number) then you can get even better bokeh by shooting the flower at an aperture of f2.8ish.
More Advanced Photographers
What’s that? Child’s play you say? Well Peter Parker (Get it? From Spider-man… he was a photographer) buckle up because here are some more advanced tips. If you really want to get a sharp close up images then use a macro lens or close-up attachment to really fill the frame with your precious flowers. Generally a focal length longer than 70mm is ideal (100mm would be perfect). Now once you’ve slapped your macro lens on turn off auto focus and use manual focus so you can get an even sharper image and more control.
Final Tips
- Use a spray bottle with water to give the illusion of morning dew or recent rain
- Shoot a flower with the sun behind it so it’s almost see through
- Shoot a flower from beneath it for a change of perspective
- Don’t be afraid to cut unwanted weeds away from the flower for better composition
- Set your camera to exposure bracketing so you get the best photo (back-lighting of flowers can trick your light meter)
If you get a fantastic flower picture and would like to share then submit it to the Photo Journal to be featured on this site.
Submit Your Picture Here!


Good advice, John, and I like that the camera data is included. It helps to see what settings create what kind of photo.
Thanks, I’m going to include it more often. I like when I’m reading about new ideas on the web or in a book and all that information is there as well.