
If you grew up in the country there is a good chance that, as a child, you probably ran around bare-foot catching lightning bugs and putting them in a well vented jar (or you suffocated them in a vent-less jar like a giant jerk). If not, I’m sure you’ve seen a firefly or two and gazed in wonderment at the only beetle that looks like God shoved a glow stick up its butt. My point is this, there is something amazing about fireflies and capturing them in a photograph can create images that stir old memories and look surreal.
For the past three years I’ve threatened to take photographs of lightning bugs (or fireflies depending on where you are from) and just now finally got around to it. I headed back to my family’s farm and carefully dodged tics and bears to bring you this tutorial. The best thing about completing this tutorial is that my mom and dad, who are also passionate about photography, were shooting right next to me. Without further ado, here is a shimmering firefly photography tutorial.
Step One: Gear
You’ll need a camera that you can adjust manually and can shoot for longer than 30 seconds. You’d think that all manual cameras can shoot longer than 30 seconds these days (in bulb mode) but there are still a few that have limitations as you increase the ISO (I’m talking to you Leica). Any lens will do, the longer the lens the more you can compress the scene to give the impression of more fireflies… The wider the lens the more light it will let in (meaning lower ISO or faster shutter speed) and the more environment you’ll capture. A remote for your shutter is very helpful as shooting in bulb mode requires the shutter to be depressed to start and once again to end the exposure, without a remote you introduce camera shake on the second depression of the shutter. And finally, a tripod is absolutely essential.
Step Two: Composition
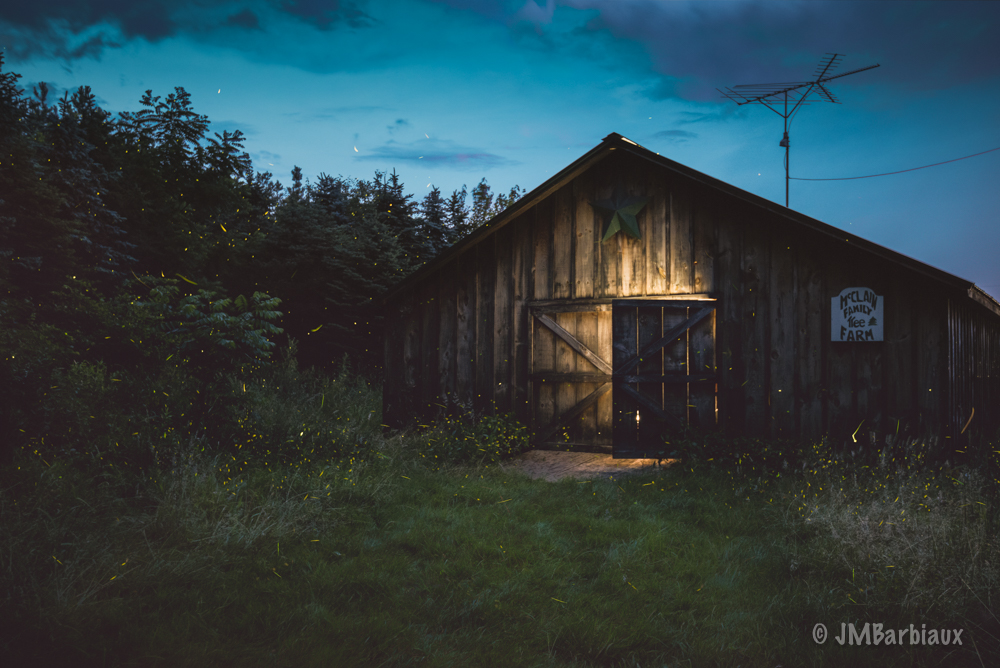
If you’re really interested in photographing fireflies then there is a good chance this isn’t the first, or last, tutorial you’ll read on the subject. There is a good chance that this is the best composed image depicting firefly photography in any of those tutorials. I’m not being arrogant, I’m just pointing out that anyone can take a photograph (or photographs) with fireflies in them… The difficult part, the part that most of the tutorials you (and I) have read fail to accomplish, is capturing the fireflies with an eye-catching scene. If you want to capture awesome firefly photography you need to compose it in a way that the photograph would work without the fireflies as well.
Step Three: Settings
Here’s the thing, there is no hard and fast way to do this. The truth is, there are a few different ways to capture fireflies and very few wrong ways to do it. My process for the photo above was this:
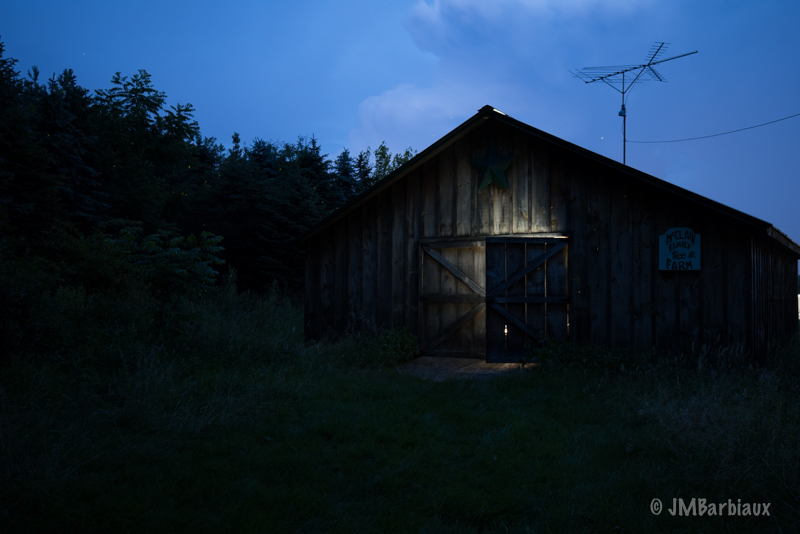
I started with a base image, one that was exposed enough that I wouldn’t lose all the detail in the shadow area. This image should be exposed as you would if it were the only image you were taking (forget about fireflies for this shot). Here are the settings:
ISO 1000, 15 second shutter speed, f/4
After this base photograph I captured about 20 different images (without nudging my camera or tripod) with varying shutter speeds but the same goal of keeping the images underexposed. You see, now that I had my base image I did not care about retaining detail other than the light from the lightning bugs.
Note: I’m not sure if different species of firefly act differently but it is worth noting that the ones I was photographing only lit up briefly as they flew around. Had they stayed lit longer I would have increased my ISO and reduced my shutter speed to eliminate long trails from the fireflies. If you prefer long trails you can reduce your ISO and increase your shutter speed.
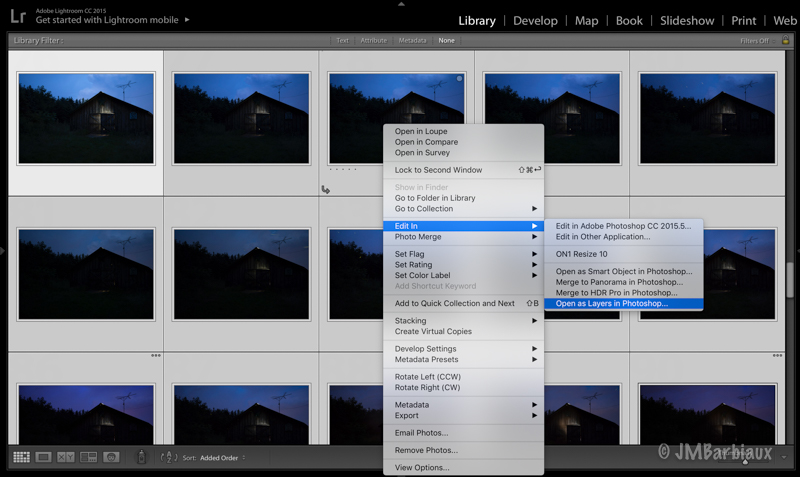
After creating a number of images, you’ll want a good many so you can stack them in post processing to increase the number of fireflies, you’ll want to import them into Photoshop as layers. Simply right-click the image in Lightroom and scroll down to Edit, Open as Layers in Photoshop and wait for all of your images to open in Photoshop.
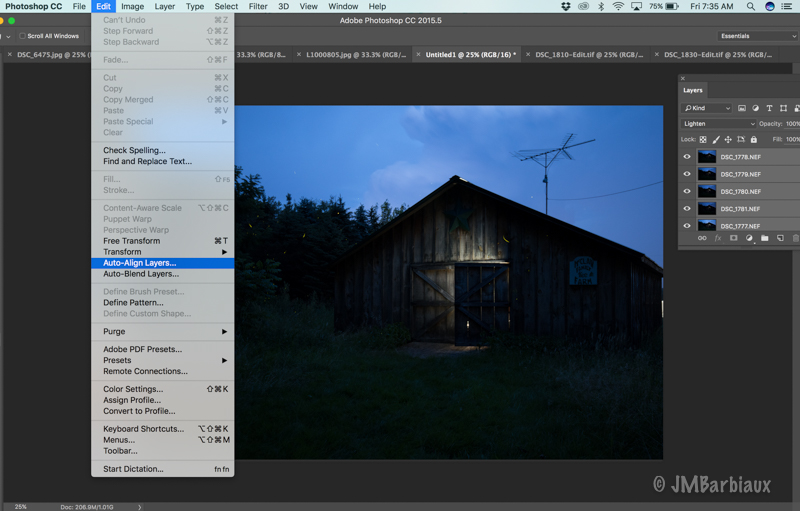
Once all the images are opened as layers in Photoshop you can move your base image to the bottom of the stack so that it is your background image. Then navigate to Edit, Auto-Align Layers…, this will make sure your image stays sharp in the off-chance you bumped your camera slightly while creating all your images.

Finally, highlight all the layers except your bottom (or background) image and choose Lighten in the layers panel. This will bring the brightest light forward exposing all of the lightning bug flashes from all of the various layers on your background image. Simply flatten your image after this, save it back to Lightroom, and edit it to your heart’s content.
Conclusion
This was the most fun I’ve had with my camera in quite some time. Experiment with different settings (like a wider aperture to create bokeh) and stay focused on capturing landscapes that work on their own rather than only worrying about the fireflies. Feel free to share your best shots with me at PhotolisticLife@gmail.com for a chance to be featured here on the site. Don’t forget to share your thoughts in the comments section below. Enjoy!


Great information, searching the Internet, there were not many tutorials on photographing lightning bugs. Your material is very precise and easy to follow, thank you.
My pleasure! Thank you for the feedback.